


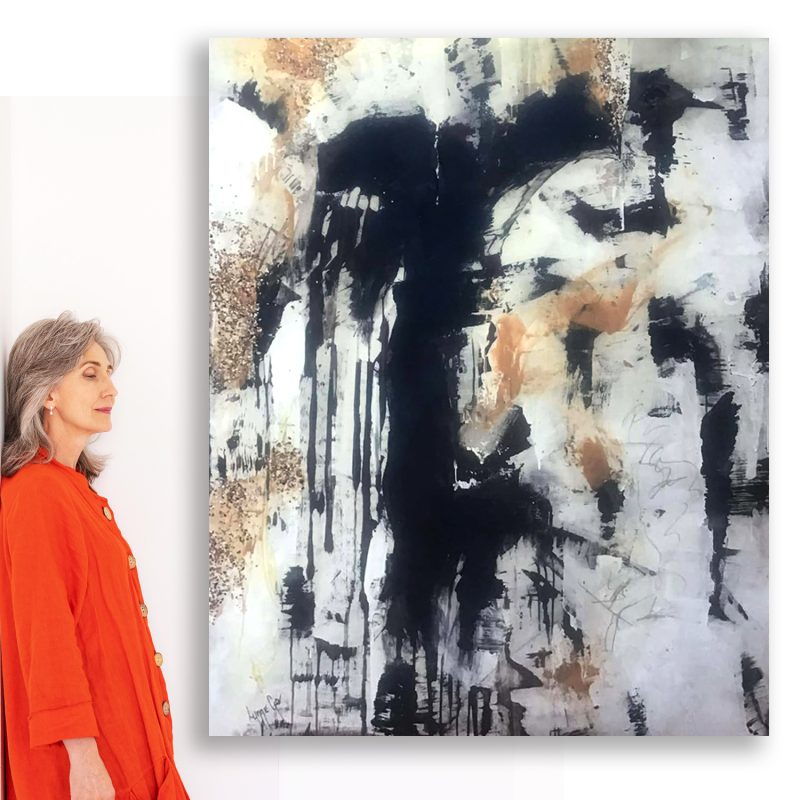
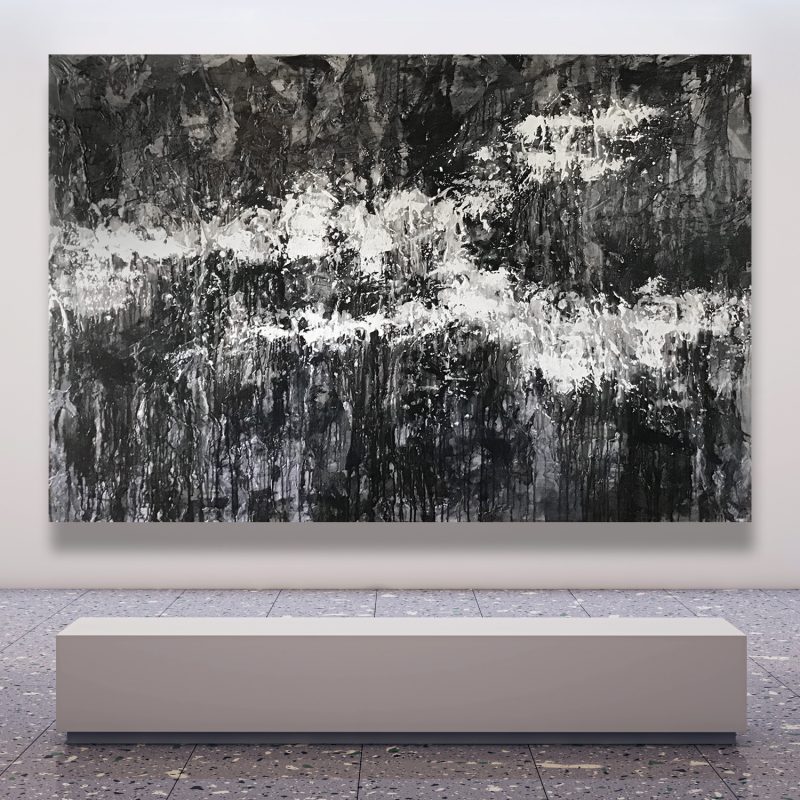
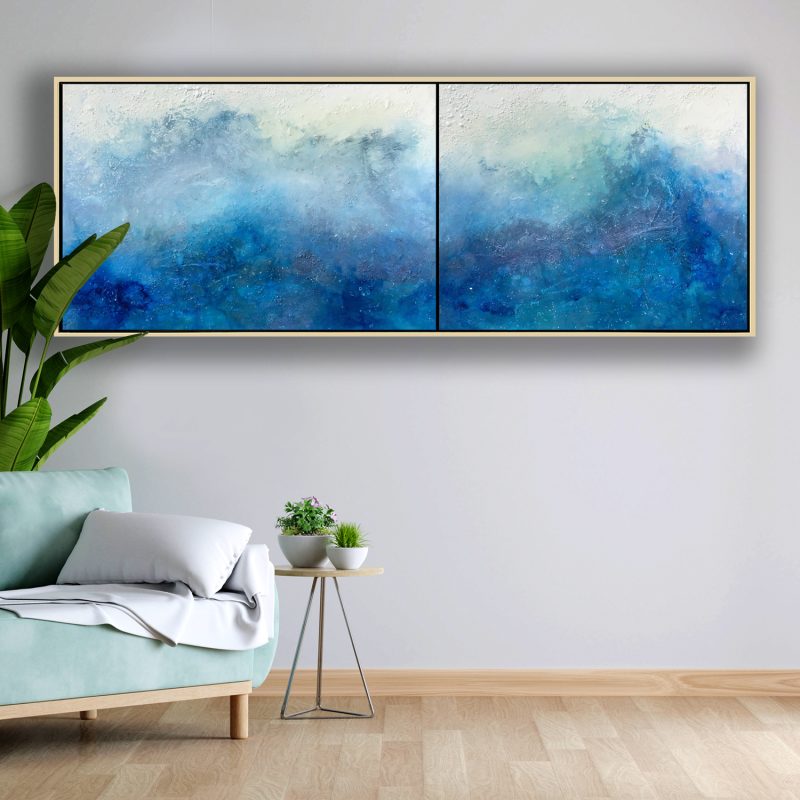
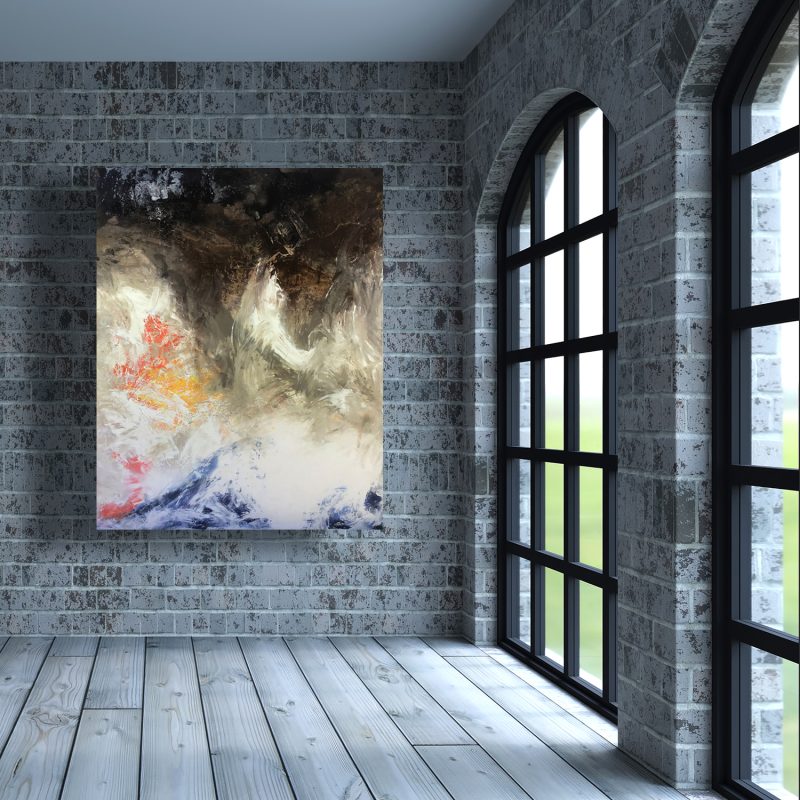
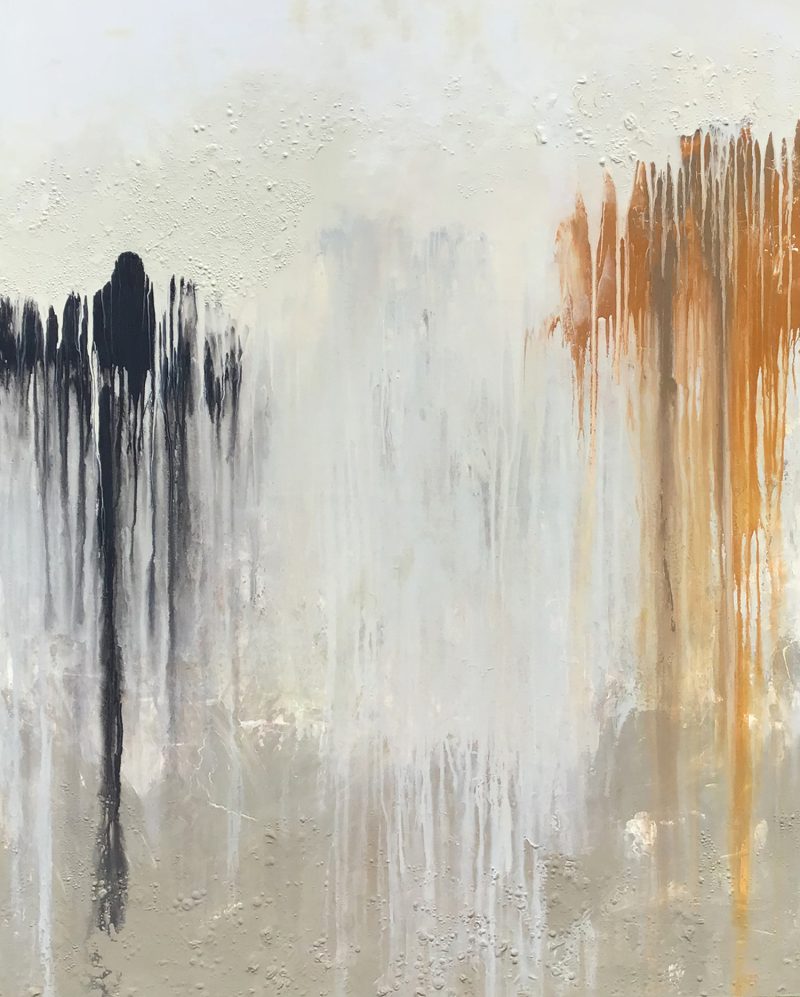
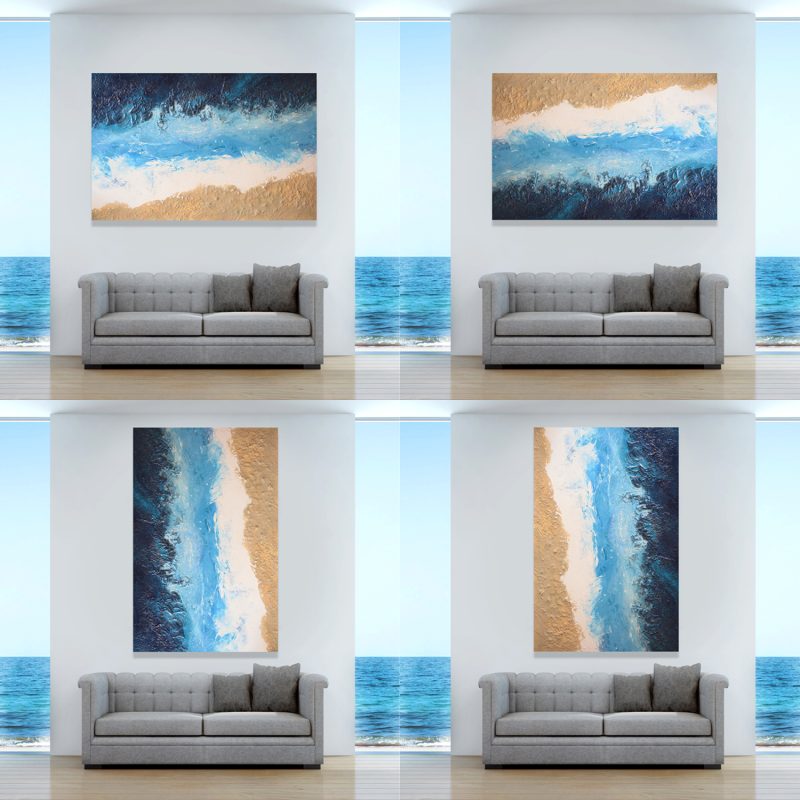
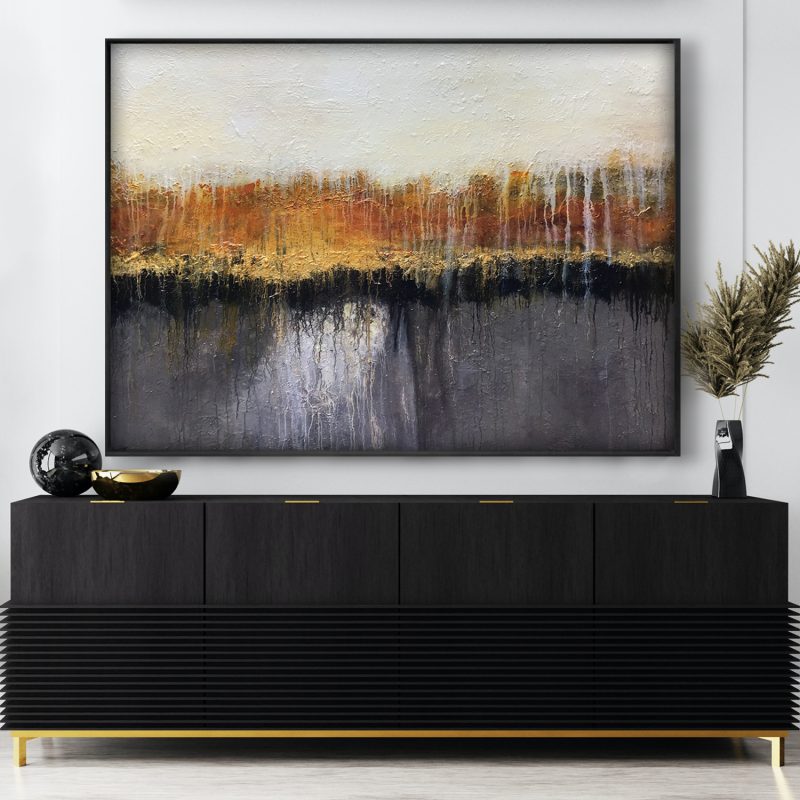
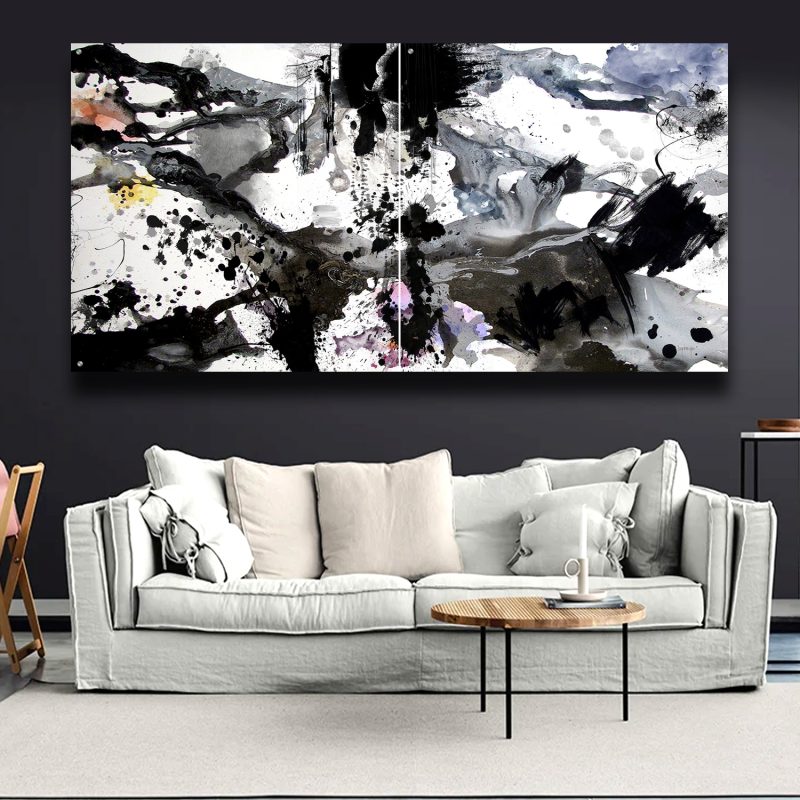
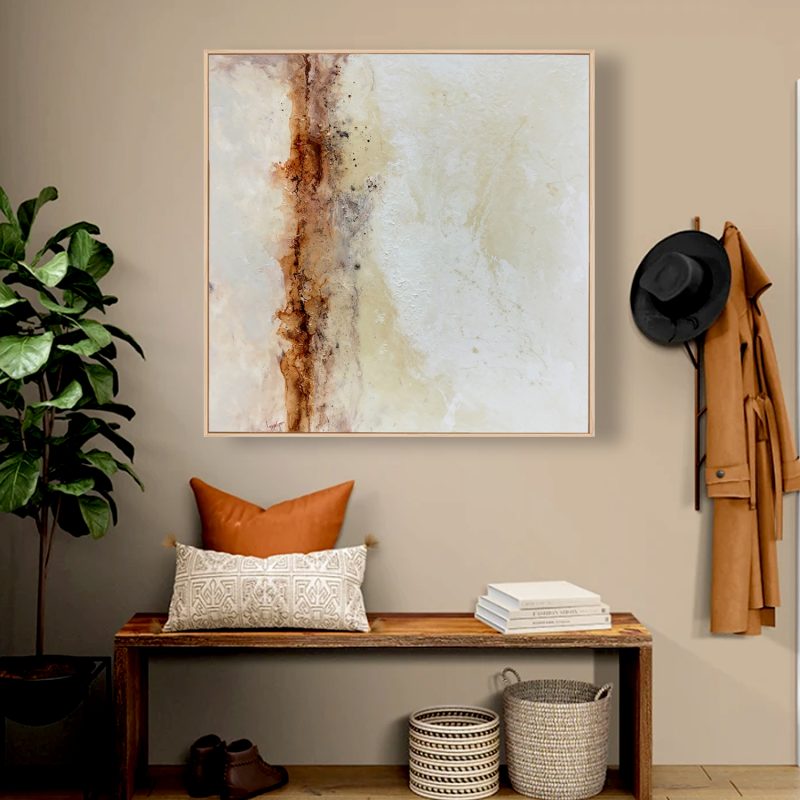
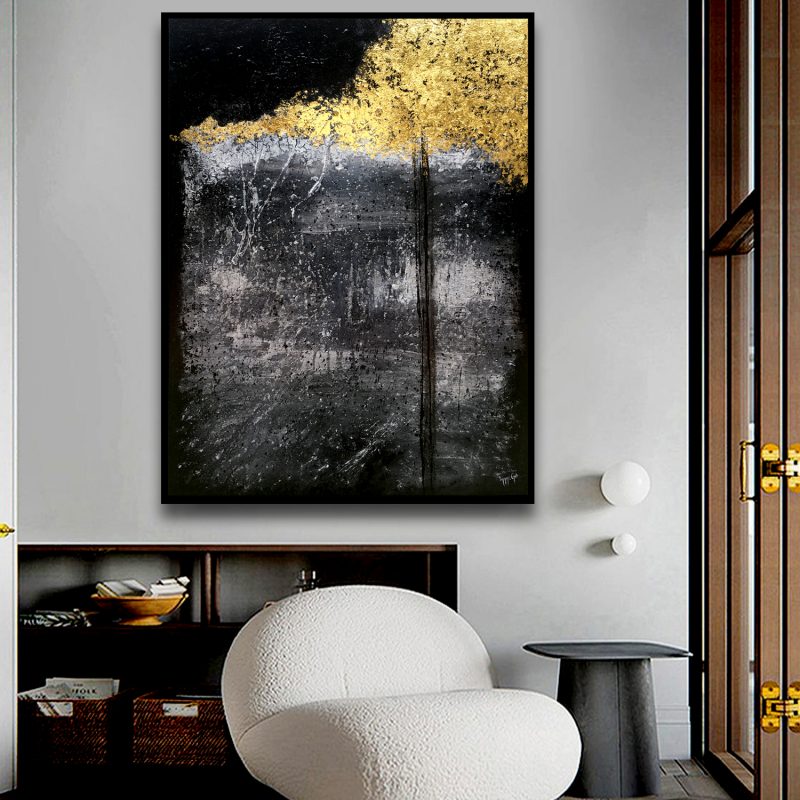
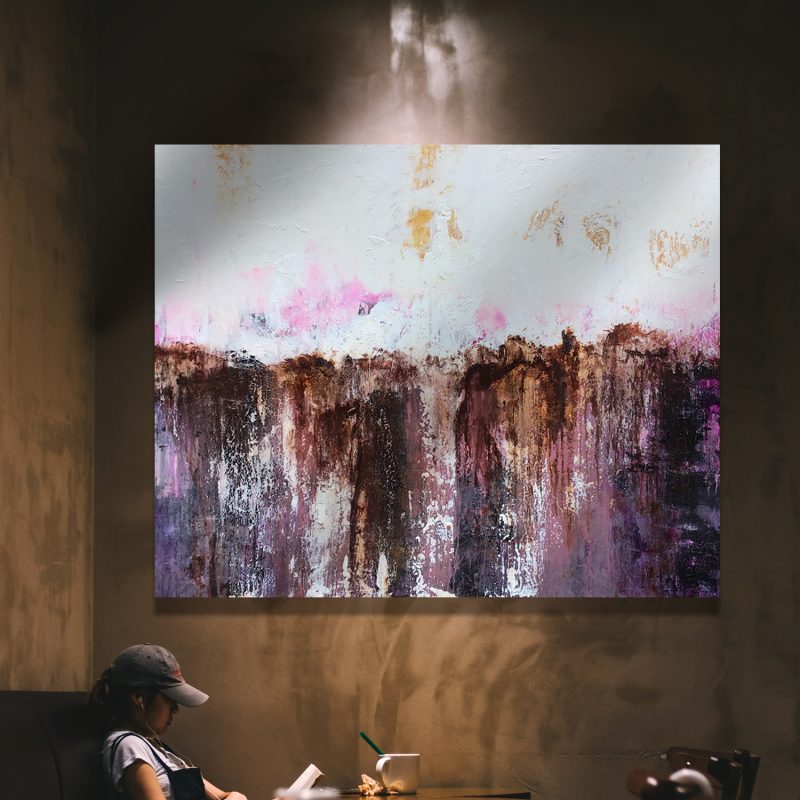
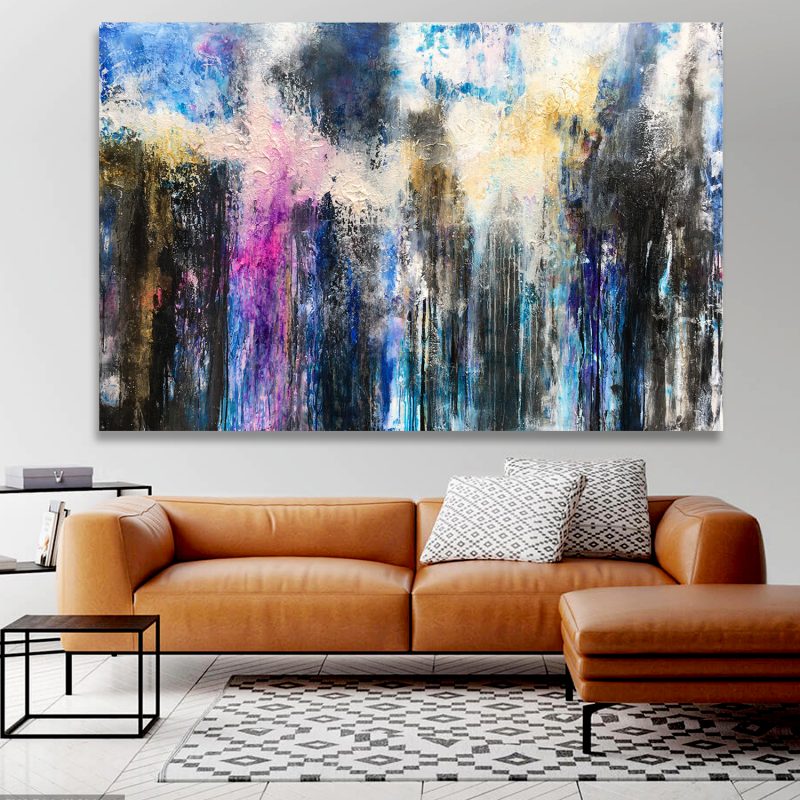
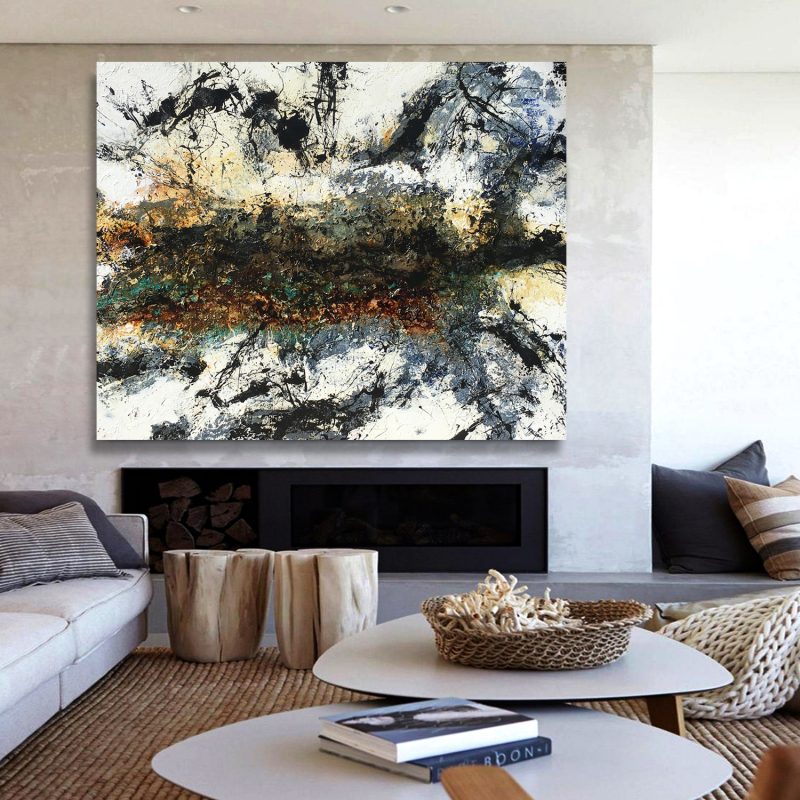
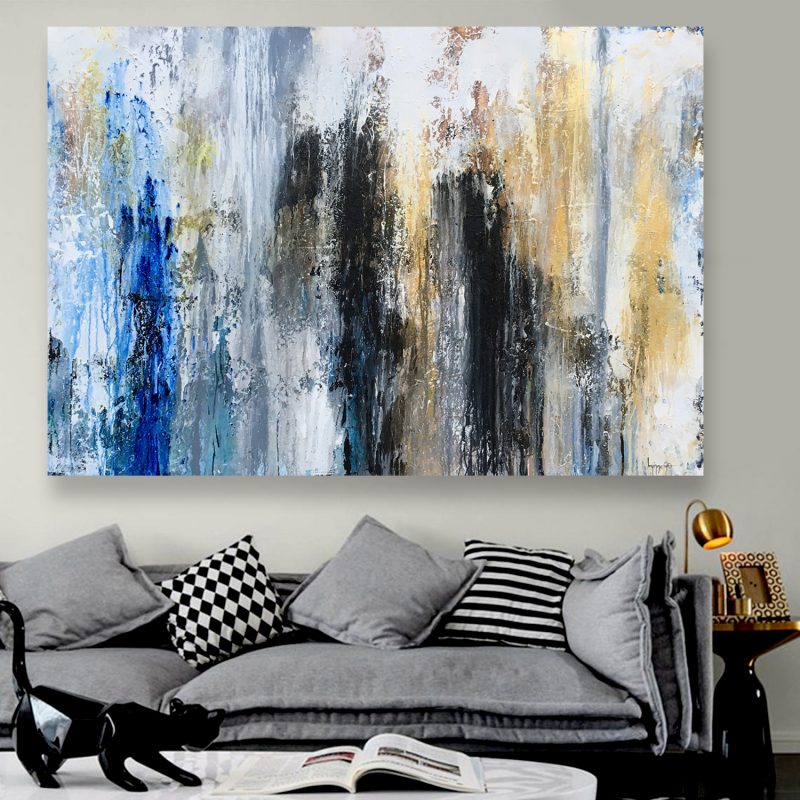
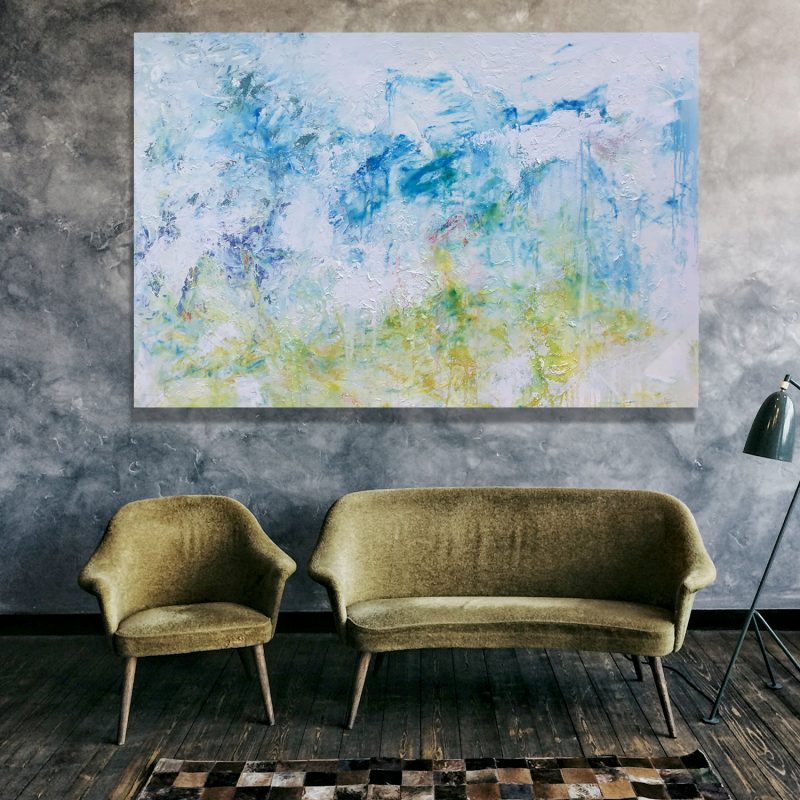
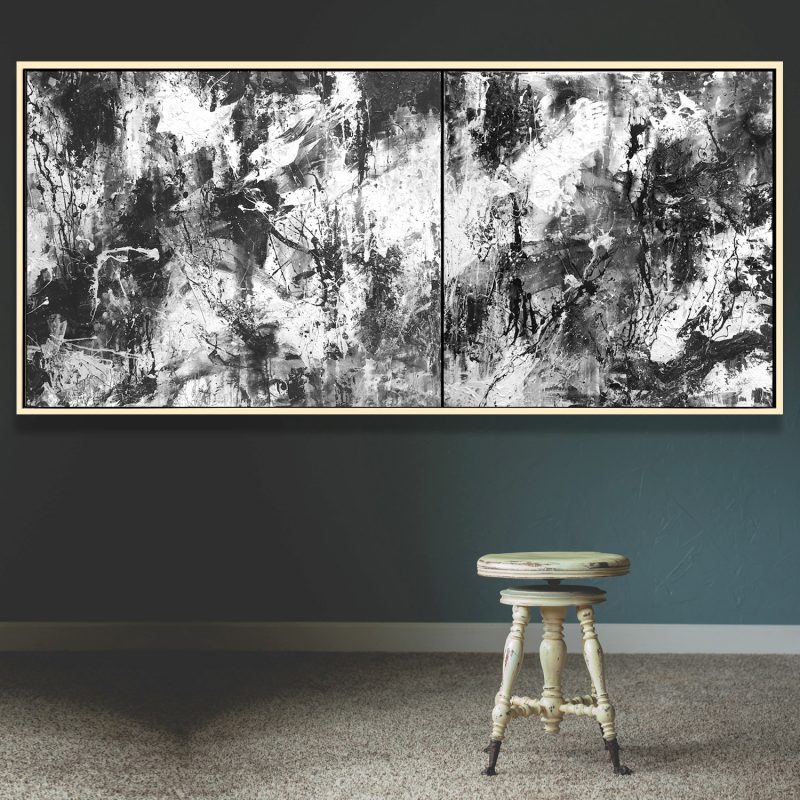
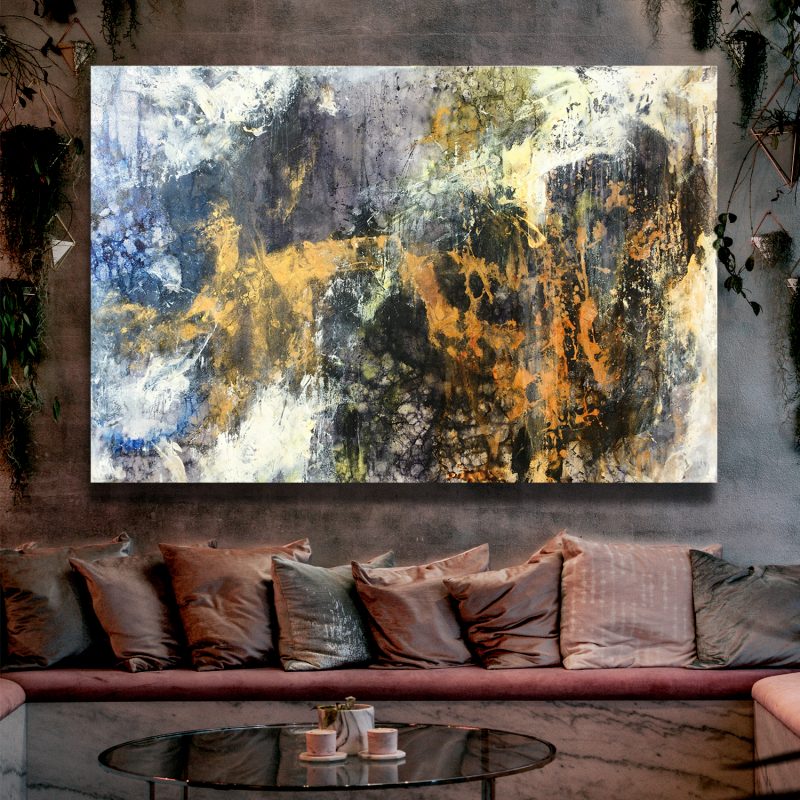
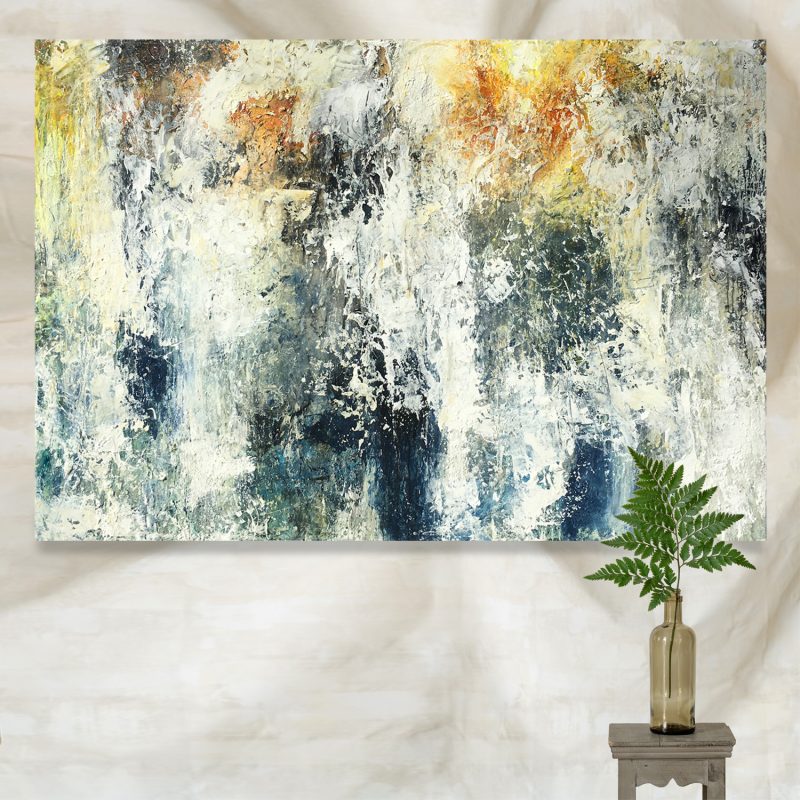
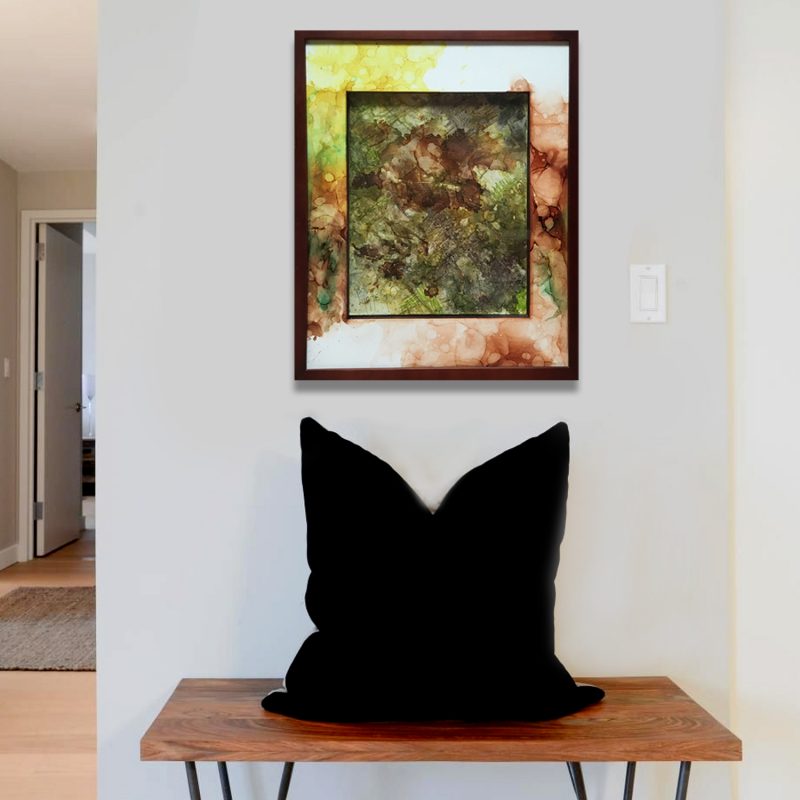
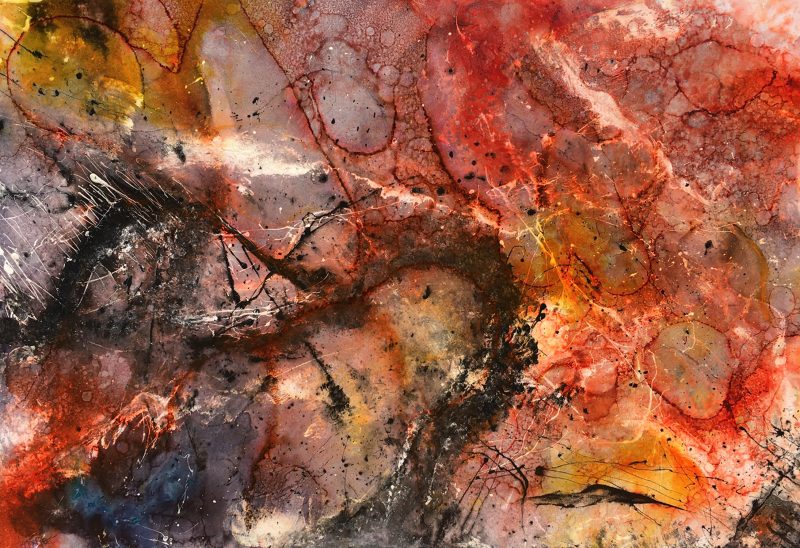
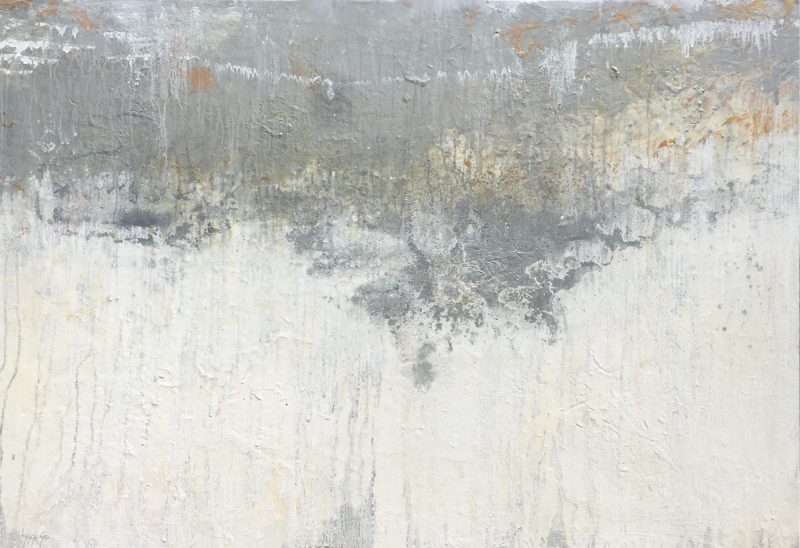
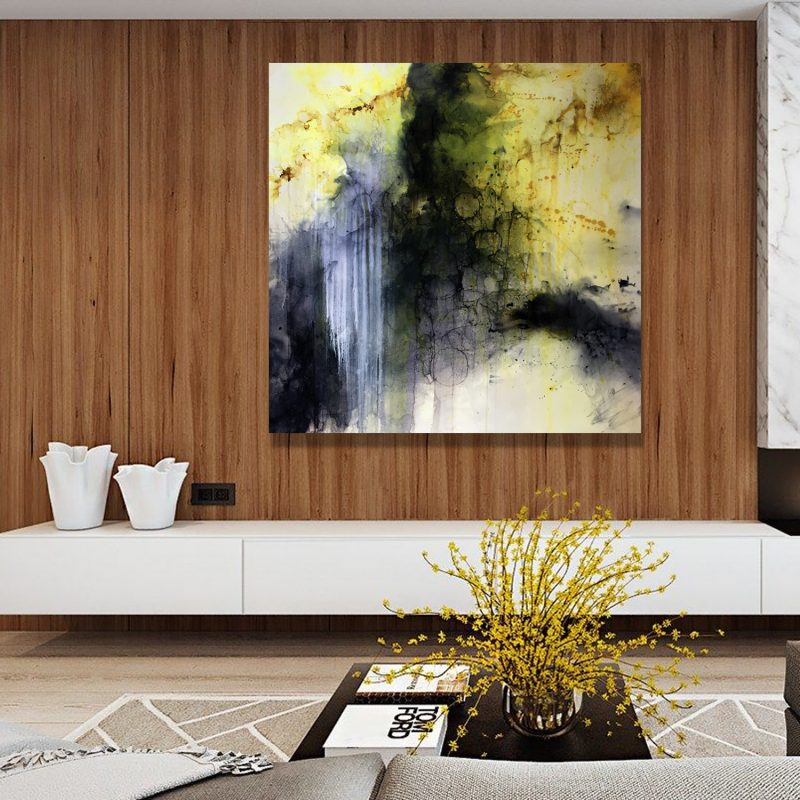
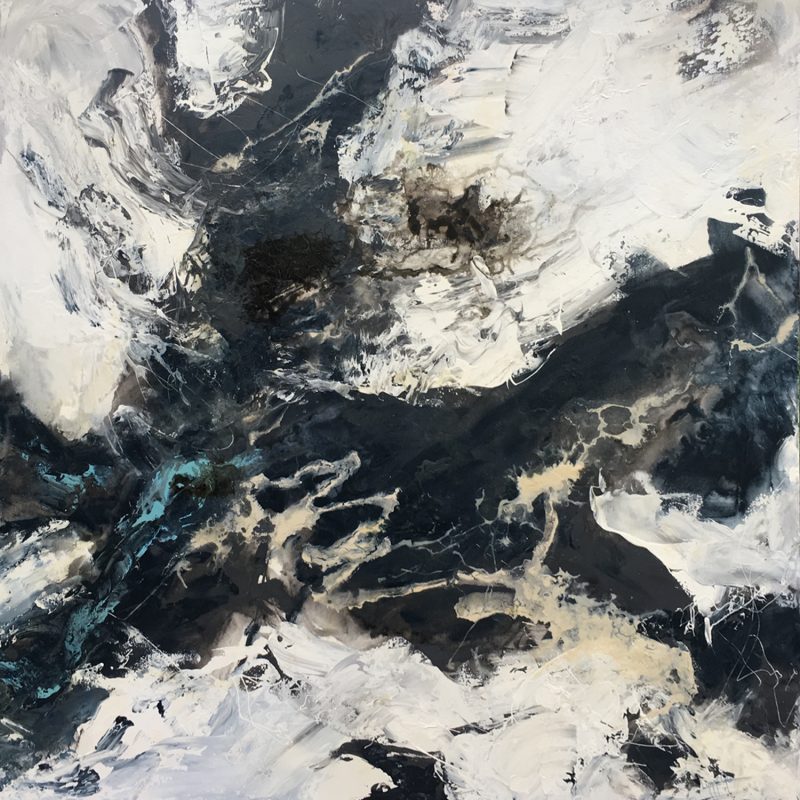
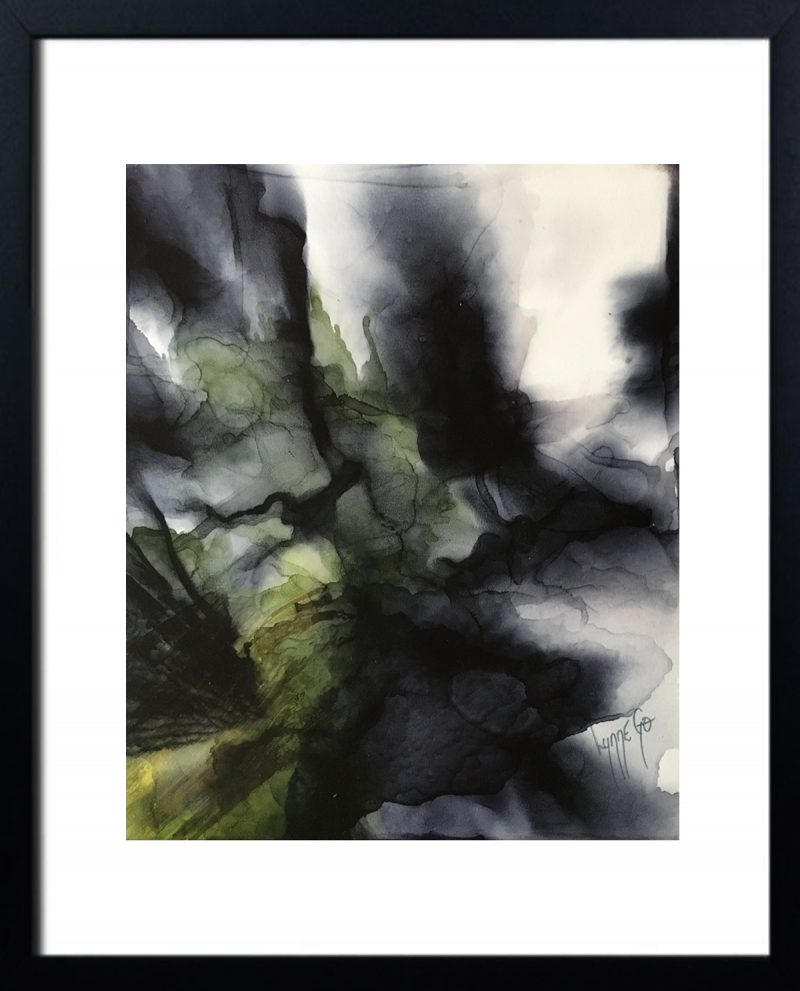
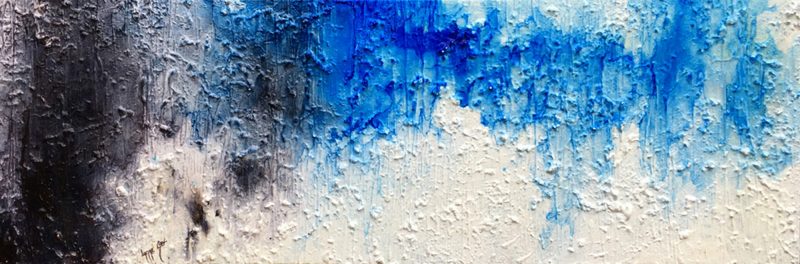
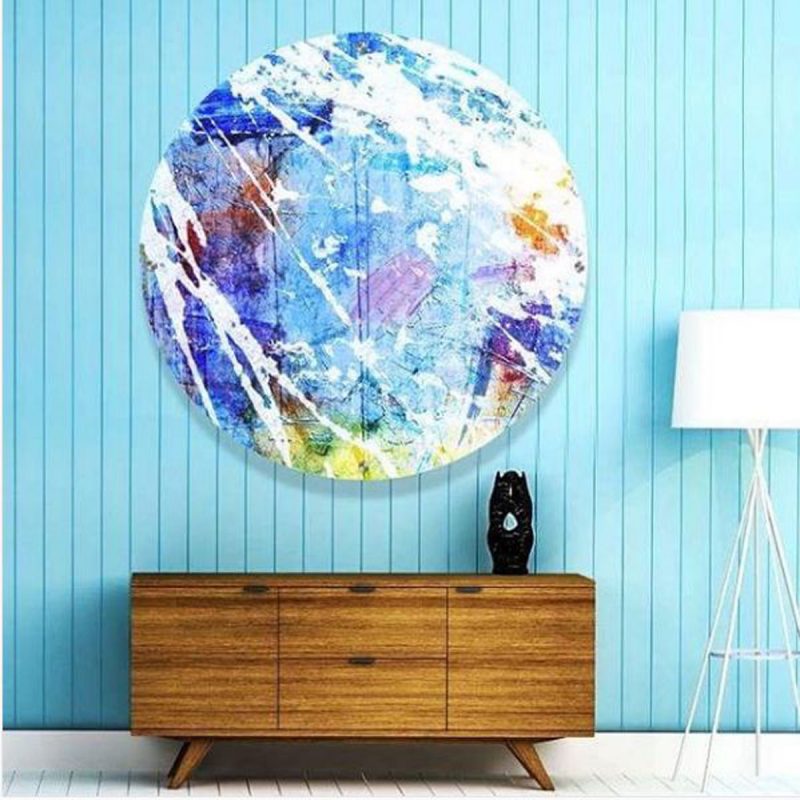
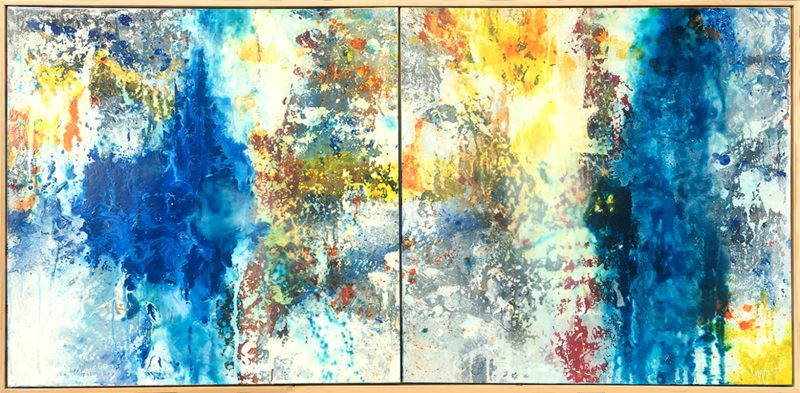
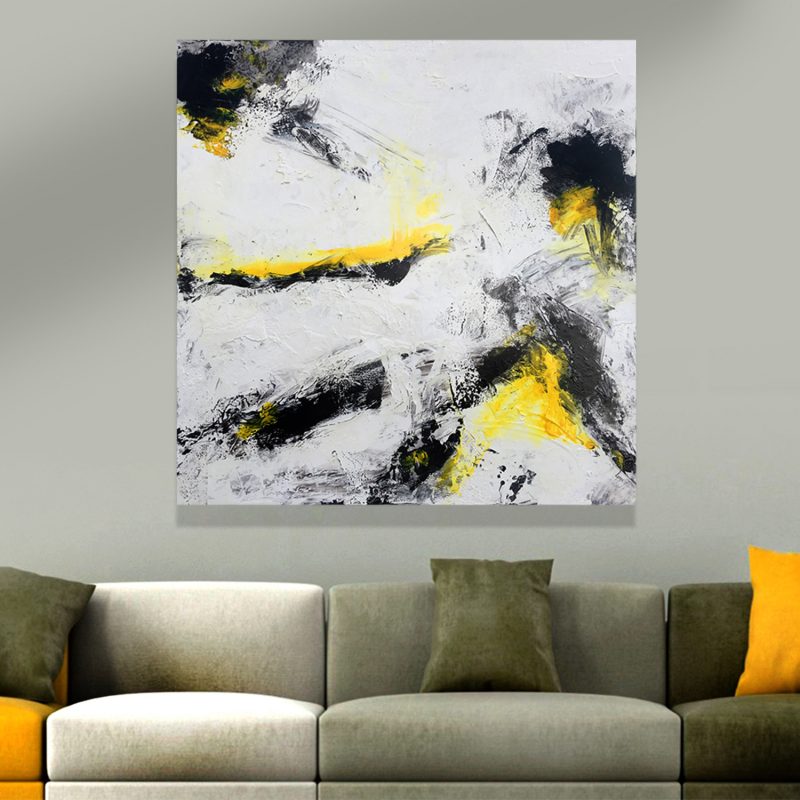
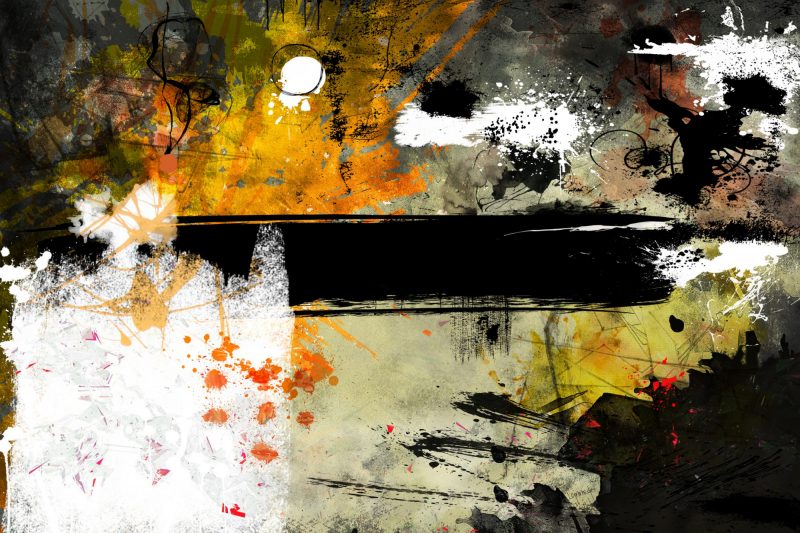
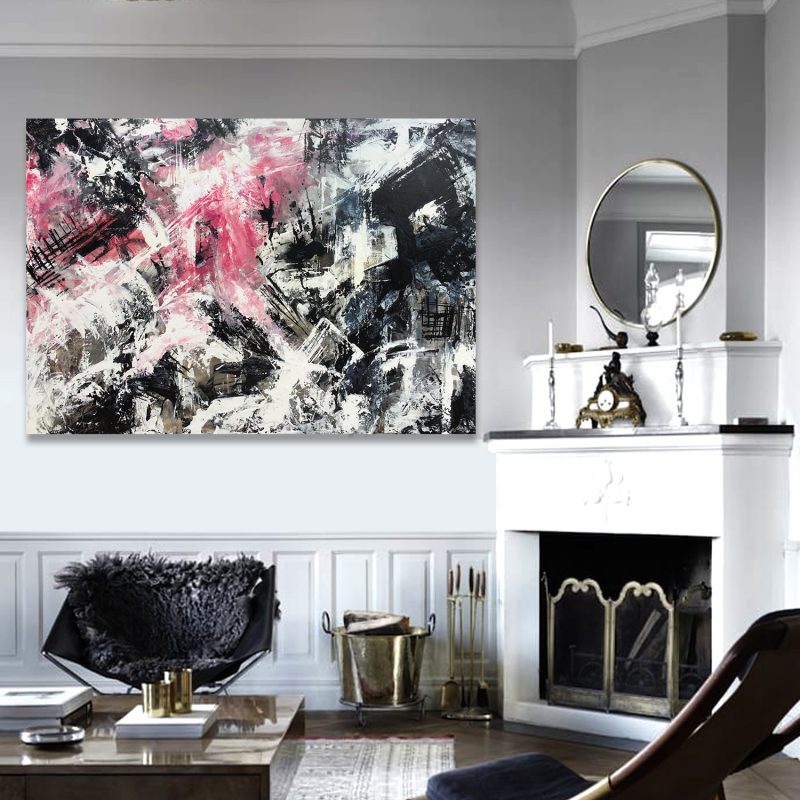
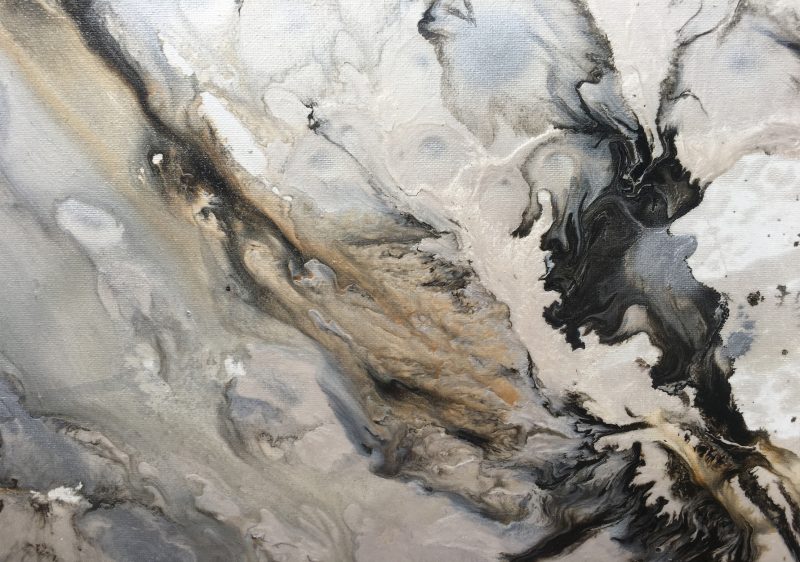
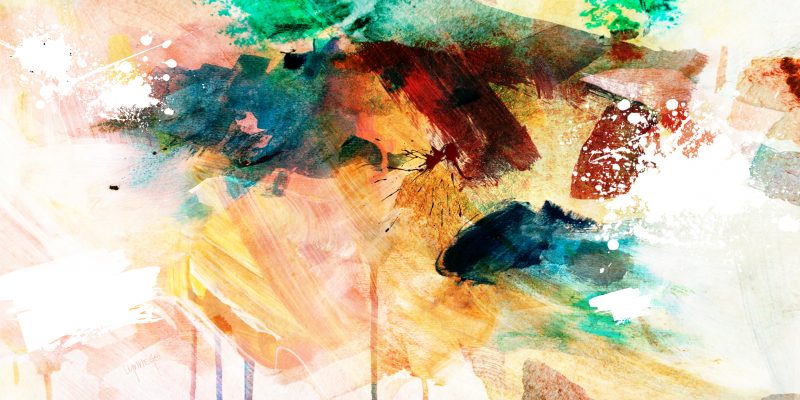
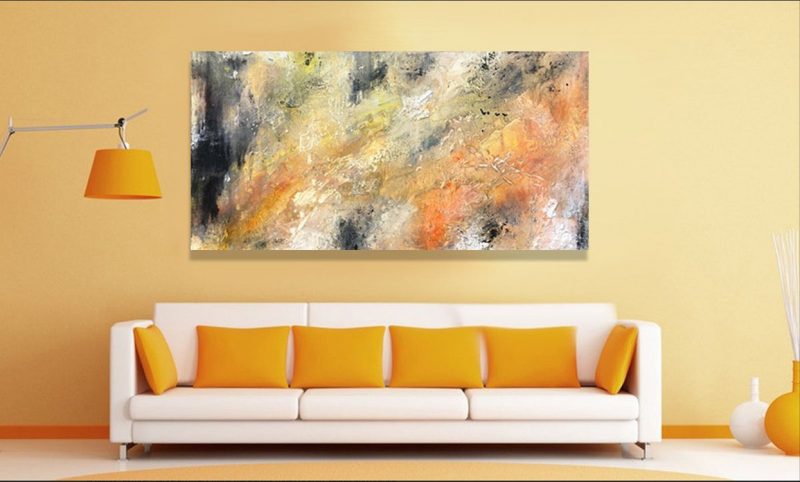
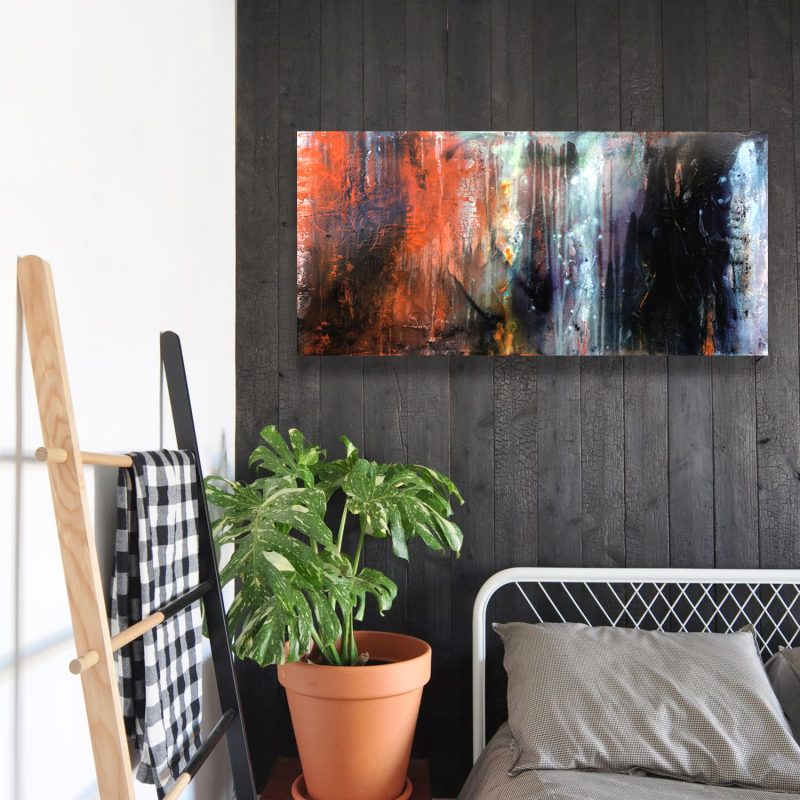
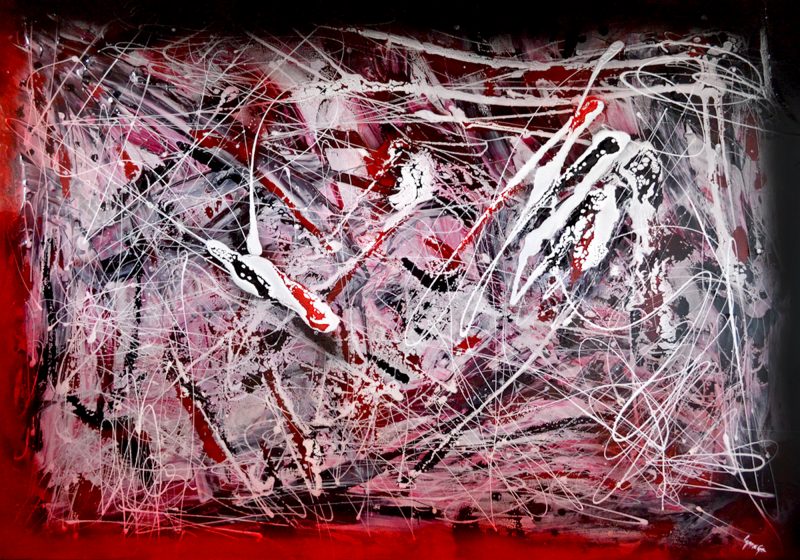
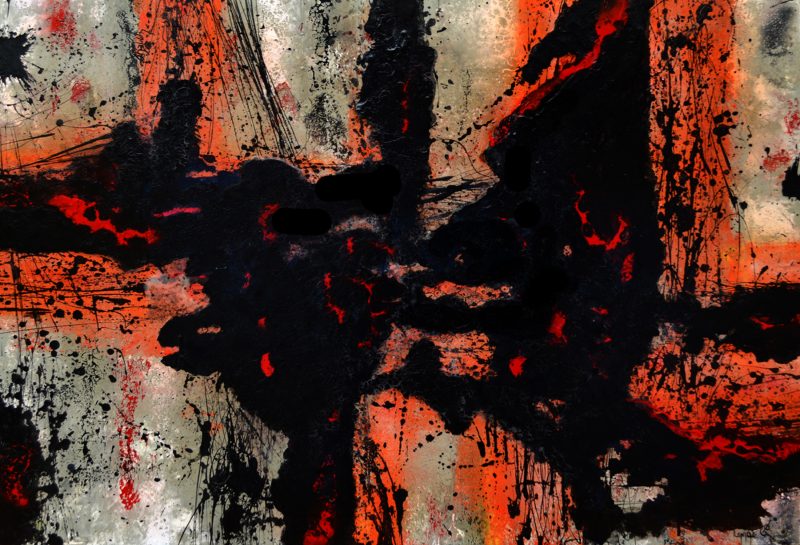
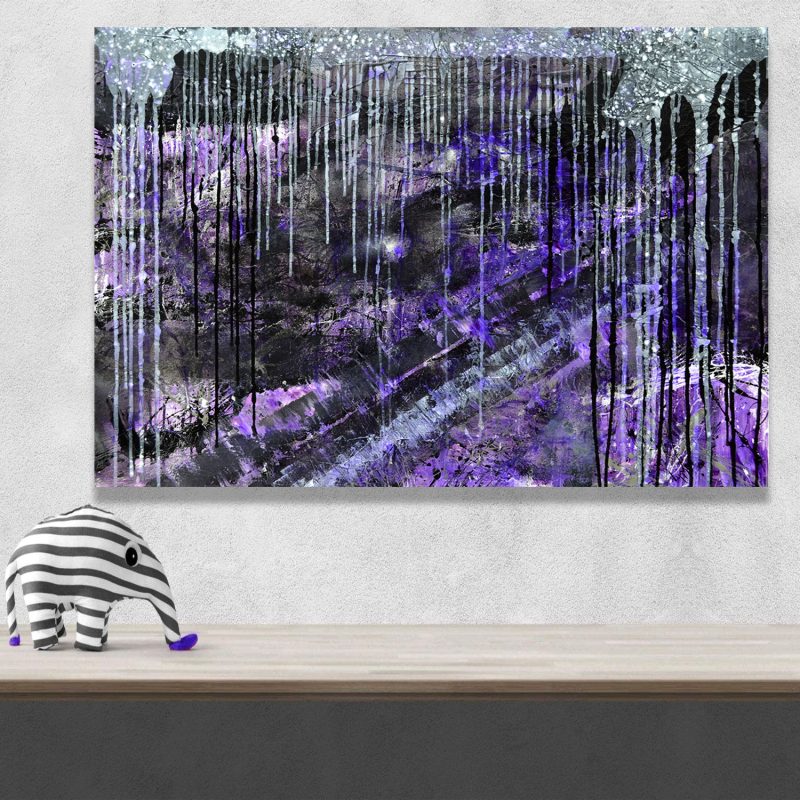
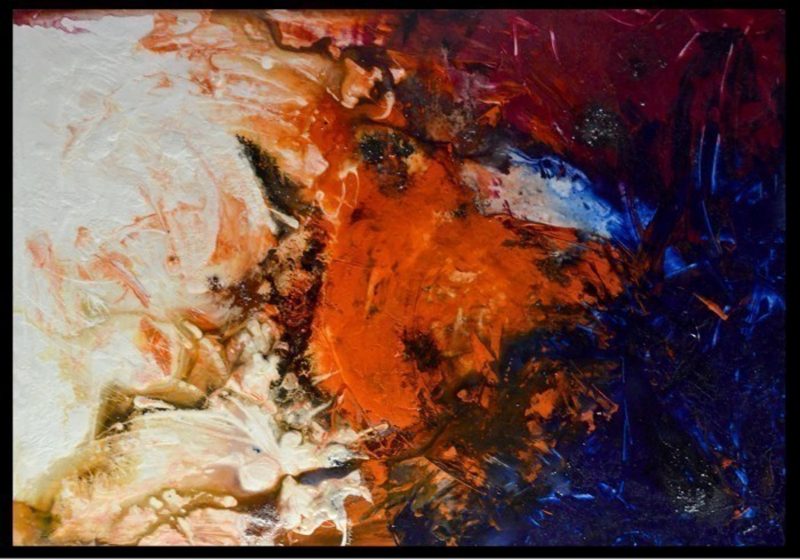
Day By Day by Lynne Godina-Orme.
This was a very exhausting piece for me to create. After 20 months of health problems, I finally have gotten back into the studio. The process was confusing; I couldn’t convey what I wanted this abstract to portray. There are so many layers as I kept adding different elements but still was not getting the right composition. It was very dark with the use of black and dark browns, very somber. Finally, I bit the bullet and painted over it with white to start again. Making sure not use any blacks or dark tones, I am so happy with this final version. Day By Day says it all.
Original price was: AUD$2,500.AUD$2,250Current price is: AUD$2,250.
Size:
180w
x 123h
x 4d
cms
View in my room
Acrylic on stretched canvas
Ready to hang
In stock
Sold By: Lynne Godina-OrmeLove this
Day By Day by Lynne Godina-Orme.
This was a very exhausting piece for me to create. After 20 months of health problems, I finally have gotten back into the studio. The process was confusing; I couldn’t convey what I wanted this abstract to portray. There are so many layers as I kept adding different elements but still was not getting the right composition. It was very dark with the use of black and dark browns, very somber. Finally, I bit the bullet and painted over it with white to start again. Making sure not use any blacks or dark tones, I am so happy with this final version. Day By Day says it all.
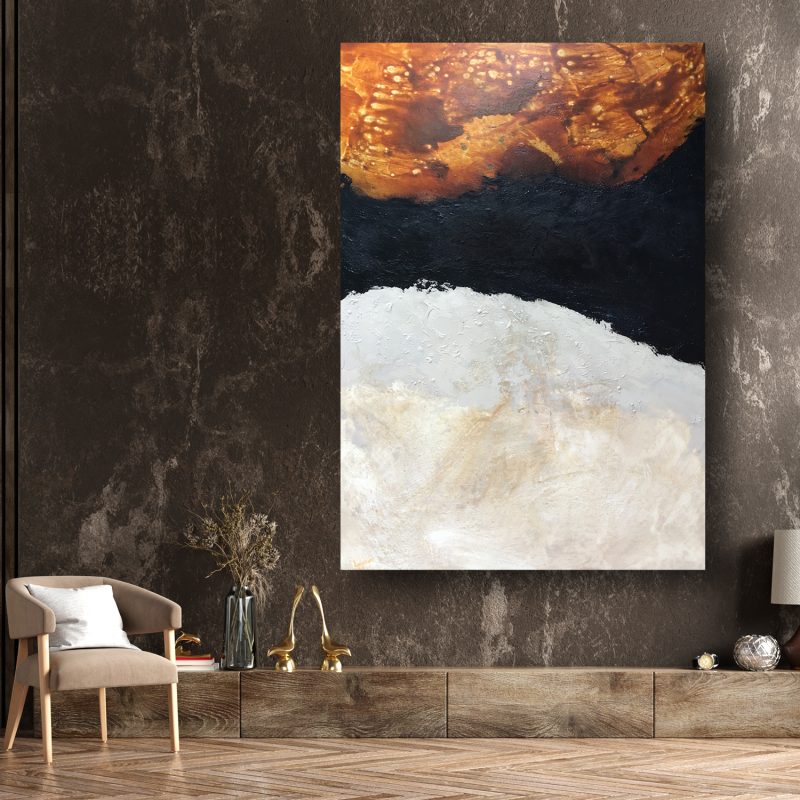
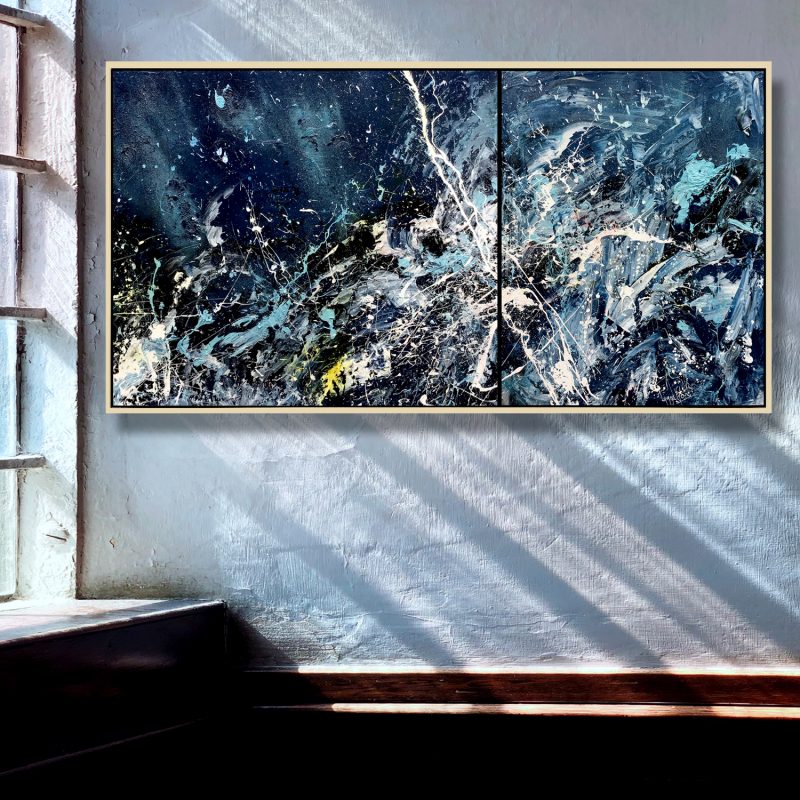
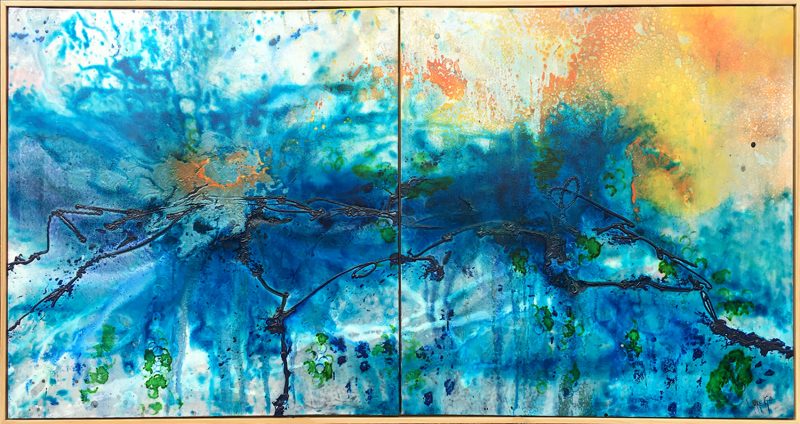
 Threshold Of Change
Original price was: AUD$3,200.AUD$2,880Current price is: AUD$2,880.
Size:
195w
x 130h
x 4d
cms
Lynne Godina-Orme
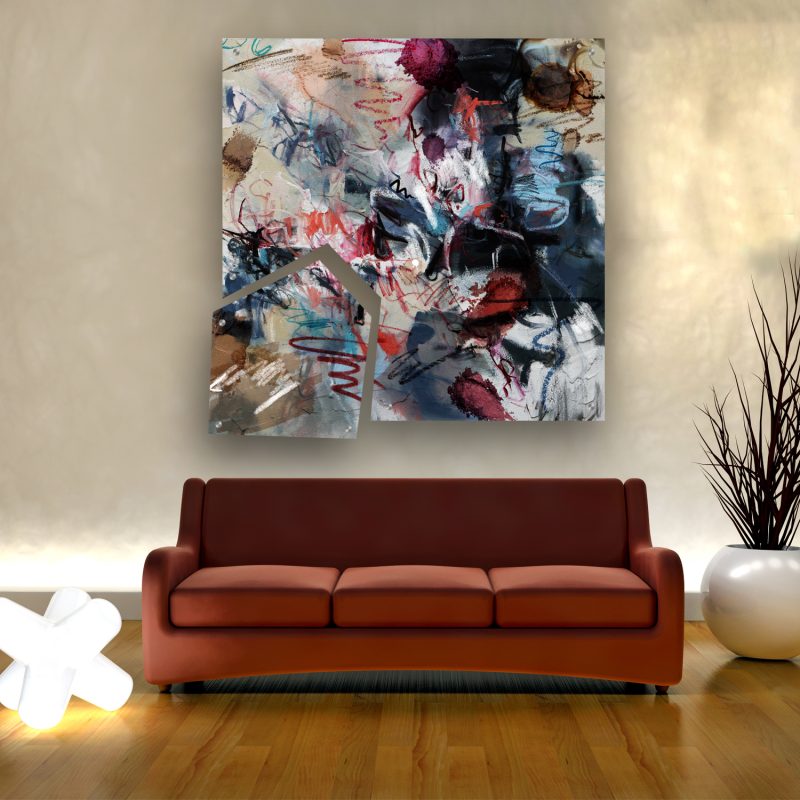
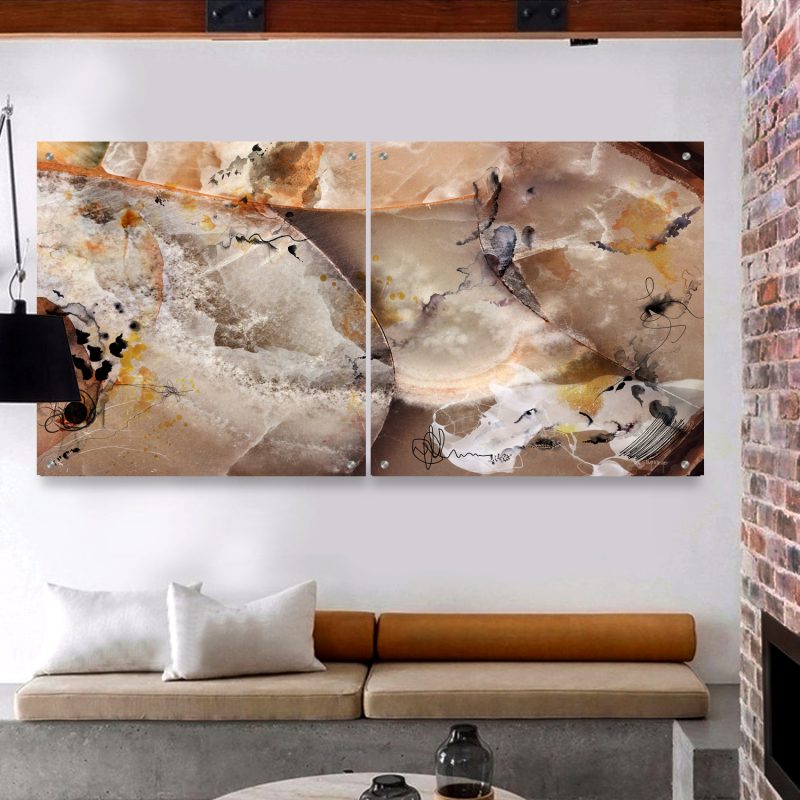
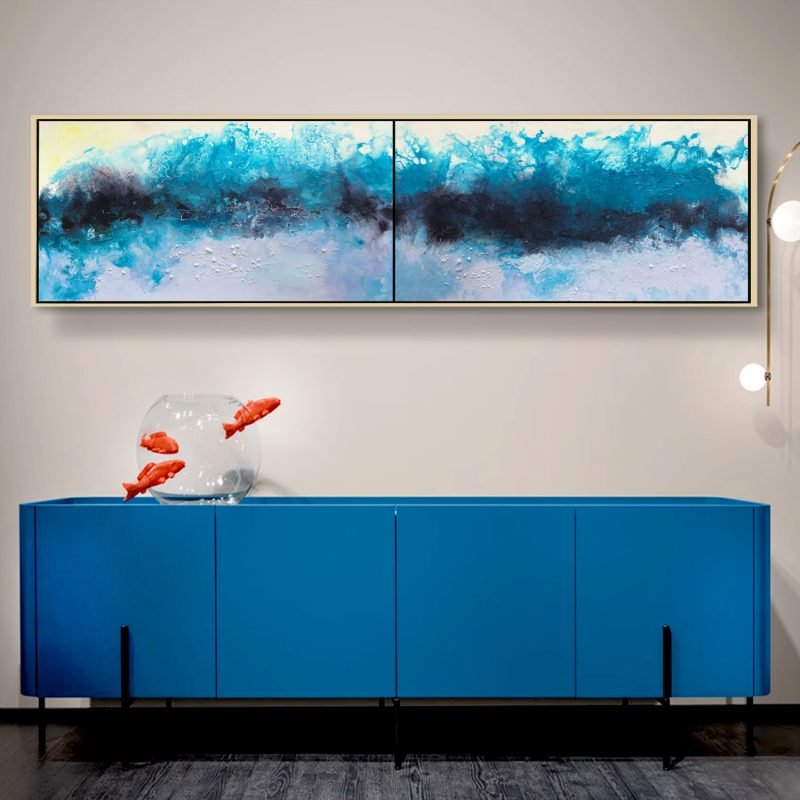
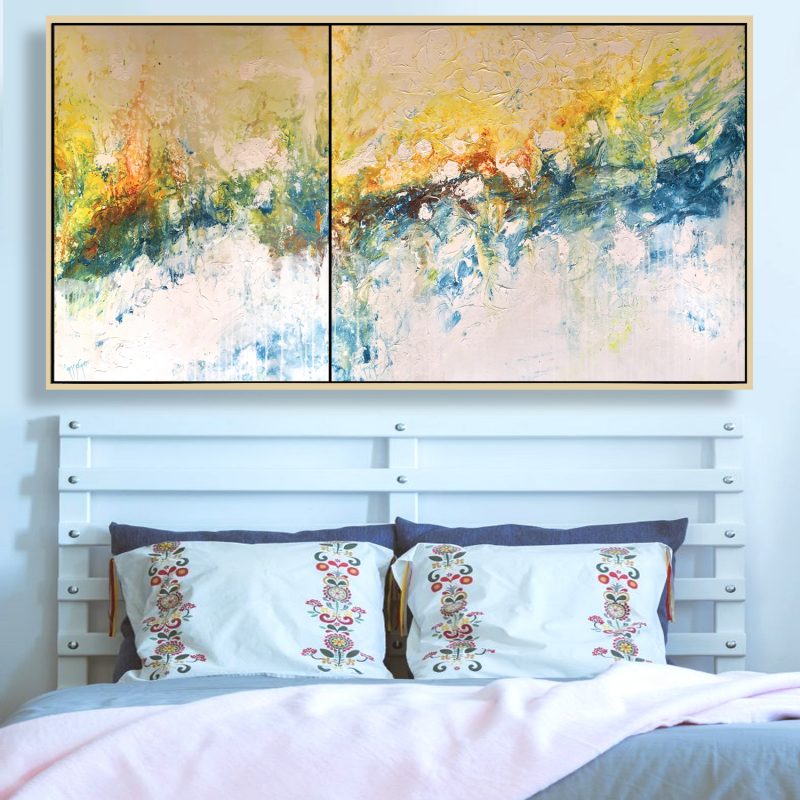
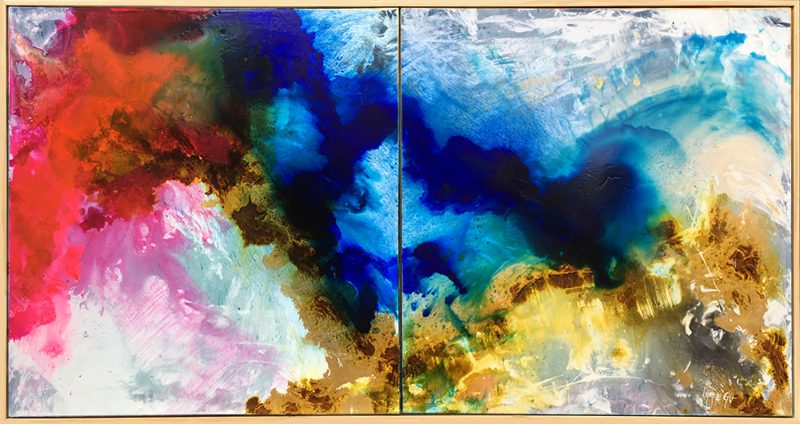
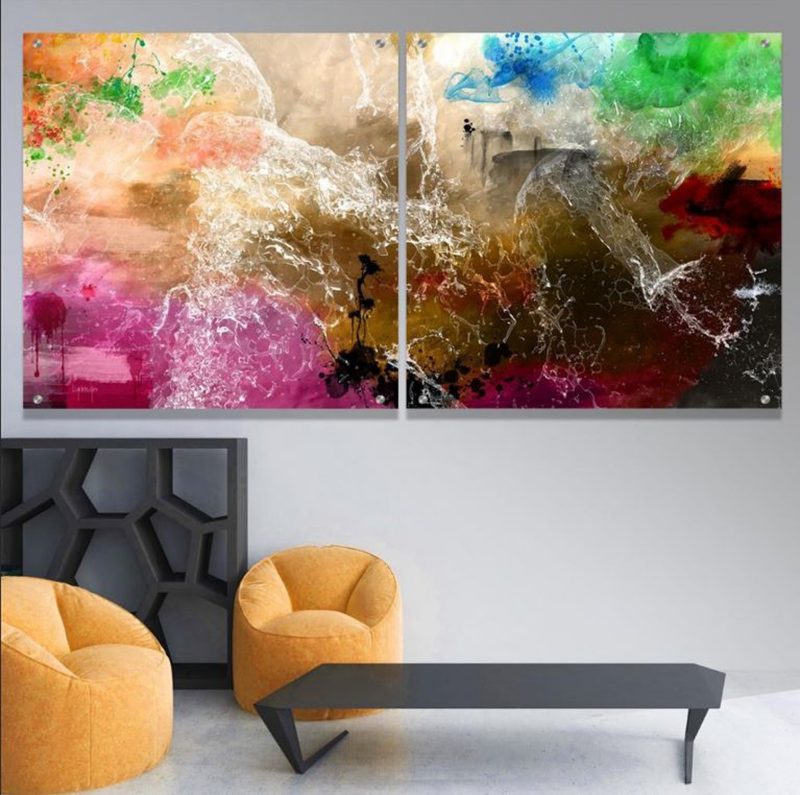
 Beyond The Divide – Diptych
Original price was: AUD$1,900.AUD$1,710Current price is: AUD$1,710.
Size:
125w
x 125h
x 3d
cms
Lynne Godina-Orme
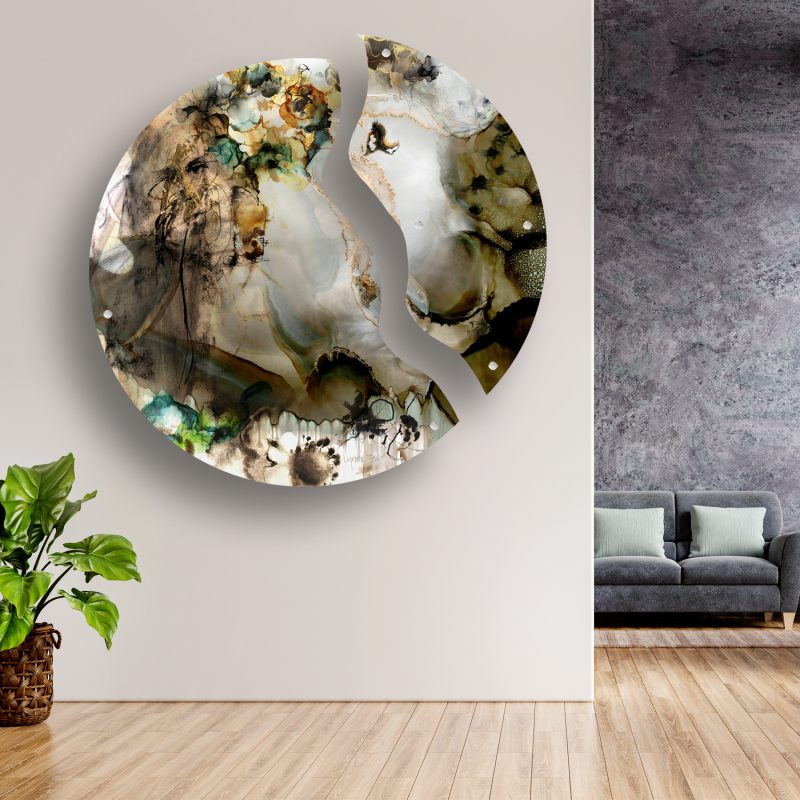
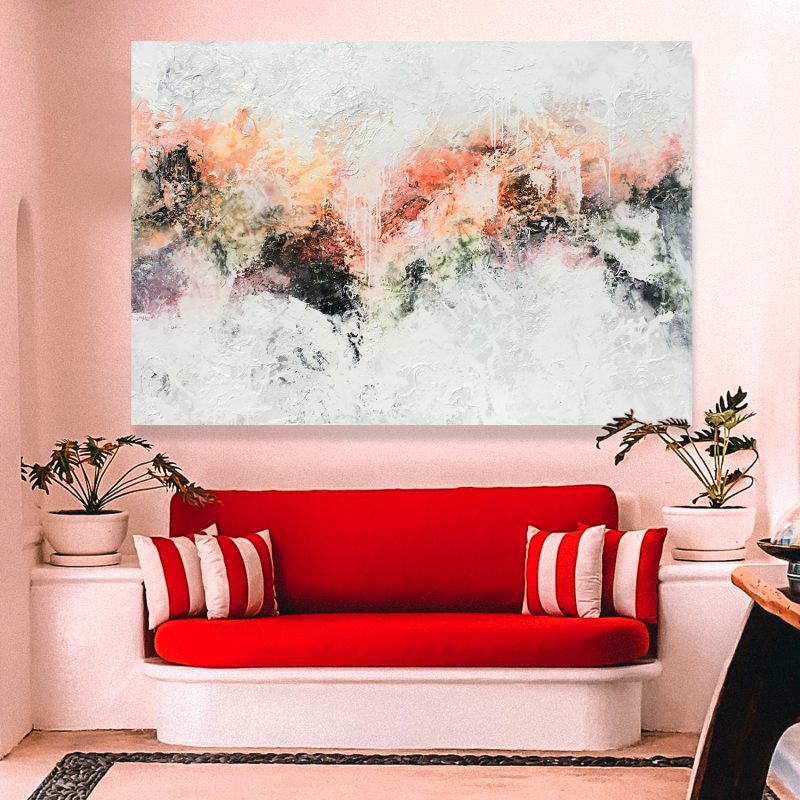
 Fragmented Reflections
Original price was: AUD$2,300.AUD$2,070Current price is: AUD$2,070.
Size:
122w
x 152h
x 4d
cms
Lynne Godina-Orme
 Make Today Count
Original price was: AUD$2,100.AUD$1,890Current price is: AUD$1,890.
Size:
122w
x 153h
x 4d
cms
Lynne Godina-Orme
 Mix And Match – Diptych
Original price was: AUD$1,700.AUD$1,530Current price is: AUD$1,530.
Size:
125w
x 125h
x 3d
cms
Lynne Godina-Orme
 Midnight Moonlight
Original price was: AUD$2,900.AUD$2,610Current price is: AUD$2,610.
Size:
190w
x 130h
x 4d
cms
Lynne Godina-Orme
 Dust Storm – Diptych
Original price was: AUD$1,900.AUD$1,710Current price is: AUD$1,710.
Size:
125w
x 125h
x 3d
cms
Lynne Godina-Orme
 Reckless – Diptych
Original price was: AUD$1,900.AUD$1,710Current price is: AUD$1,710.
Size:
125w
x 125h
x 3d
cms
Lynne Godina-Orme
 A Harsh Land
Original price was: AUD$1,700.AUD$1,530Current price is: AUD$1,530.
Size:
126w
x 96h
x 5d
cms
Lynne Godina-Orme
 Push And Pull
Original price was: AUD$1,950.AUD$1,755Current price is: AUD$1,755.
Size:
170w
x 64h
x 5d
cms
Lynne Godina-Orme
 Sandstorm
Original price was: AUD$2,800.AUD$2,520Current price is: AUD$2,520.
Size:
120w
x 180h
x 4d
cms
Lynne Godina-Orme
 Caught In The Moment
Original price was: AUD$1,900.AUD$1,710Current price is: AUD$1,710.
Size:
165w
x 53h
x 5d
cms
Lynne Godina-Orme
 As The Sun Sets – Diptych
Suggested Price: AUD$1,900
Size:
125w
x 125h
x 3d
cms
Lynne Godina-Orme
 Red Sky At Night
Original price was: AUD$1,900.AUD$1,710Current price is: AUD$1,710.
Size:
165w
x 53h
x 5d
cms
Lynne Godina-Orme
 Turning The Corner
Original price was: AUD$2,100.AUD$1,890Current price is: AUD$1,890.
Size:
122w
x 153h
x 4d
cms
Lynne Godina-Orme
 Find Your Voice – Diptych
Original price was: AUD$1,900.AUD$1,710Current price is: AUD$1,710.
Size:
125w
x 125h
x 3d
cms
Lynne Godina-Orme
 Nurture Nature
Original price was: AUD$3,100.AUD$2,790Current price is: AUD$2,790.
Size:
120w
x 180h
x 4d
cms
Lynne Godina-Orme
 Lipstick Jungle – Diptych
Original price was: AUD$1,900.AUD$1,710Current price is: AUD$1,710.
Size:
125w
x 125h
x 3d
cms
Lynne Godina-Orme
 You’re More Than Enough Ltd Ed Print
Price range: AUD$441 through AUD$2,520
Lynne Godina-Orme
 Days End – Diptych
Original price was: AUD$1,800.AUD$1,620Current price is: AUD$1,620.
Size:
125w
x 125h
x 3d
cms
Lynne Godina-Orme
 Break The Rules – Diptych
Original price was: AUD$1,800.AUD$1,620Current price is: AUD$1,620.
Size:
125w
x 125h
x 3d
cms
Lynne Godina-Orme
 Counting The Days – Diptych
Original price was: AUD$2,600.AUD$2,340Current price is: AUD$2,340.
Size:
240w
x 120h
x 3d
cms
Lynne Godina-Orme
 Pushing Boundaries
Original price was: AUD$1,400.AUD$1,260Current price is: AUD$1,260.
Size:
61w
x 152h
x 4d
cms
Lynne Godina-Orme
 Wild And Free
Original price was: AUD$3,950.AUD$3,555Current price is: AUD$3,555.
Size:
195w
x 130h
x 4d
cms
Lynne Godina-Orme
 Solid Ground
Original price was: AUD$1,100.AUD$990Current price is: AUD$990.
Size:
79w
x 79h
x 6d
cms
Lynne Godina-Orme
 Days In The Sun
Original price was: AUD$1,700.AUD$1,530Current price is: AUD$1,530.
Size:
157w
x 80h
x 5d
cms
Lynne Godina-Orme
 Blown Away
Original price was: AUD$950.AUD$855Current price is: AUD$855.
Size:
102w
x 102h
x 4d
cms
Lynne Godina-Orme
 Emotional Roller Coaster
Original price was: AUD$3,500.AUD$3,150Current price is: AUD$3,150.
Size:
169w
x 124h
x 4d
cms
Lynne Godina-Orme
 Coming Back To Life
Original price was: AUD$3,100.AUD$2,790Current price is: AUD$2,790.
Size:
180w
x 120h
x 4d
cms
Lynne Godina-Orme
 Bring The Drama
Original price was: AUD$700.AUD$630Current price is: AUD$630.
Size:
52w
x 52h
x 3d
cms
Lynne Godina-Orme
 Outside The Box
Original price was: AUD$550.AUD$495Current price is: AUD$495.
Size:
46w
x 46h
x 3d
cms
Lynne Godina-Orme
 Edge Of The Earth
Original price was: AUD$2,400.AUD$2,160Current price is: AUD$2,160.
Size:
240w
x 120h
x 3d
cms
Lynne Godina-Orme
 Stark Contrast
Original price was: AUD$3,100.AUD$2,790Current price is: AUD$2,790.
Size:
120w
x 180h
x 4d
cms
Lynne Godina-Orme
 Be So Bold
Original price was: AUD$2,400.AUD$2,160Current price is: AUD$2,160.
Size:
240w
x 120h
x 3d
cms
Lynne Godina-Orme
 Embrace The Moments
Original price was: AUD$850.AUD$765Current price is: AUD$765.
Size:
93w
x 63h
x 5d
cms
Lynne Godina-Orme
 Pushing Through The Shadows
Original price was: AUD$3,100.AUD$2,790Current price is: AUD$2,790.
Size:
180w
x 120h
x 4d
cms
Lynne Godina-Orme
 Together As One – Diptych
Original price was: AUD$3,150.AUD$2,835Current price is: AUD$2,835.
Size:
207w
x 106h
x 6d
cms
Lynne Godina-Orme
 Find The Silver Lining – Diptych
Original price was: AUD$2,150.AUD$1,935Current price is: AUD$1,935.
Size:
185w
x 63h
x 5d
cms
Lynne Godina-Orme
 Casting Shadows
Original price was: AUD$950.AUD$855Current price is: AUD$855.
Size:
91w
x 91h
x 4d
cms
Lynne Godina-Orme
 Enjoy The Moment
Original price was: AUD$1,500.AUD$1,350Current price is: AUD$1,350.
Size:
105w
x 105h
x 6d
cms
Lynne Godina-Orme
 Take The Plunge – Diptych
Original price was: AUD$1,950.AUD$1,755Current price is: AUD$1,755.
Size:
186w
x 49h
x 5d
cms
Lynne Godina-Orme
 From Land To Sea
Original price was: AUD$3,450.AUD$3,105Current price is: AUD$3,105.
Size:
130w
x 195h
x 4d
cms
Lynne Godina-Orme
 You’re More Than Enough
Original price was: AUD$2,400.AUD$2,160Current price is: AUD$2,160.
Size:
130w
x 162h
x 4d
cms
Lynne Godina-Orme
 Two Worlds Collide
Original price was: AUD$3,100.AUD$2,790Current price is: AUD$2,790.
Size:
180w
x 120h
x 4d
cms
Lynne Godina-Orme
 Talk To Me
Original price was: AUD$1,900.AUD$1,710Current price is: AUD$1,710.
Size:
125w
x 95h
x 2d
cms
Lynne Godina-Orme
 A Moment Of Bliss
Original price was: AUD$1,500.AUD$1,350Current price is: AUD$1,350.
Size:
105w
x 105h
x 6d
cms
Lynne Godina-Orme
 The Sun Will Always Shine- Diptych
Original price was: AUD$850.AUD$765Current price is: AUD$765.
Size:
105w
x 54h
x 5d
cms
Lynne Godina-Orme
 From Dusk Till Dawn – Diptych
Original price was: AUD$2,300.AUD$2,070Current price is: AUD$2,070.
Size:
170w
x 93h
x 5d
cms
Lynne Godina-Orme
 Demanding More
Original price was: AUD$2,800.AUD$2,520Current price is: AUD$2,520.
Size:
162w
x 130h
x 4d
cms
Lynne Godina-Orme
 Stay Strong
Original price was: AUD$2,800.AUD$2,520Current price is: AUD$2,520.
Size:
162w
x 130h
x 4d
cms
Lynne Godina-Orme
 Lead The Way
Original price was: AUD$2,800.AUD$2,520Current price is: AUD$2,520.
Size:
162w
x 130h
x 4d
cms
Lynne Godina-Orme
 Power Struggle
Original price was: AUD$3,500.AUD$3,150Current price is: AUD$3,150.
Size:
165w
x 133h
x 5d
cms
Lynne Godina-Orme
 Attention Seeker
Original price was: AUD$3,550.AUD$3,195Current price is: AUD$3,195.
Size:
195w
x 130h
x 4d
cms
Lynne Godina-Orme
 Look At You Now
Original price was: AUD$2,400.AUD$2,160Current price is: AUD$2,160.
Size:
162w
x 130h
x 4d
cms
Lynne Godina-Orme
 Embrace Your Strengths – Diptych
Original price was: AUD$2,300.AUD$2,070Current price is: AUD$2,070.
Size:
172w
x 95h
x 4d
cms
Lynne Godina-Orme
 Just For You
Original price was: AUD$3,450.AUD$3,105Current price is: AUD$3,105.
Size:
130w
x 195h
x 4d
cms
Lynne Godina-Orme
 Like Never Before
Original price was: AUD$3,100.AUD$2,790Current price is: AUD$2,790.
Size:
162w
x 130h
x 4d
cms
Lynne Godina-Orme
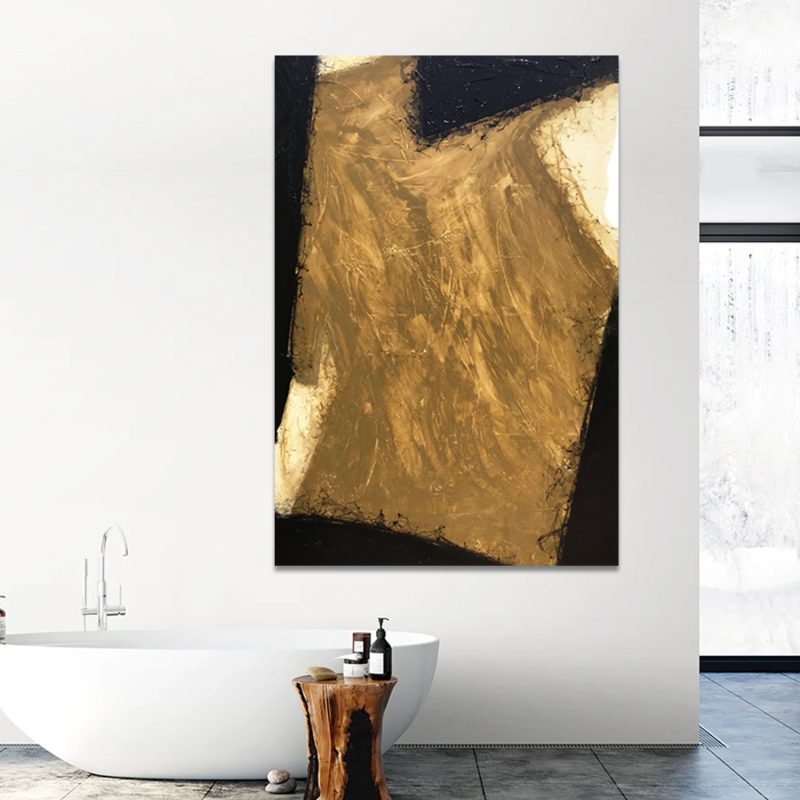
 Gold Rush
Original price was: AUD$3,350.AUD$3,015Current price is: AUD$3,015.
Size:
195w
x 130h
x 4d
cms
Lynne Godina-Orme
 Feel The Warmth
Original price was: AUD$1,300.AUD$1,170Current price is: AUD$1,170.
Size:
120w
x 120h
x 3d
cms
Lynne Godina-Orme
 Shining Through
Original price was: AUD$2,400.AUD$2,160Current price is: AUD$2,160.
Size:
162w
x 130h
x 4d
cms
Lynne Godina-Orme
 Ocean Under The Moon
Original price was: AUD$2,400.AUD$2,160Current price is: AUD$2,160.
Size:
162w
x 130h
x 4d
cms
Lynne Godina-Orme
 Stand Tall
Original price was: AUD$2,400.AUD$2,160Current price is: AUD$2,160.
Size:
180w
x 120h
x 4d
cms
Lynne Godina-Orme
 Change Of Plans
Original price was: AUD$3,450.AUD$3,105Current price is: AUD$3,105.
Size:
195w
x 130h
x 4d
cms
Lynne Godina-Orme
 Spirits Rise
Original price was: AUD$1,100.AUD$990Current price is: AUD$990.
Size:
150w
x 100h
x 1.5d
cms
Lynne Godina-Orme
 Not So Bold
Original price was: AUD$2,400.AUD$2,160Current price is: AUD$2,160.
Size:
178w
x 122h
x 4d
cms
Lynne Godina-Orme
 Dancing In The Rain
Original price was: AUD$3,100.AUD$2,790Current price is: AUD$2,790.
Size:
202w
x 94h
x 5d
cms
Lynne Godina-Orme
 Forget The Noise
Original price was: AUD$3,100.AUD$2,790Current price is: AUD$2,790.
Size:
202w
x 94h
x 5d
cms
Lynne Godina-Orme
 Peace Of Mind
Original price was: AUD$2,400.AUD$2,160Current price is: AUD$2,160.
Size:
178w
x 122h
x 4d
cms
Lynne Godina-Orme
 Start The Conversation
Original price was: AUD$3,200.AUD$2,880Current price is: AUD$2,880.
Size:
217w
x 94h
x 5d
cms
Lynne Godina-Orme
 Don’t Change A Thing
Original price was: AUD$3,200.AUD$2,880Current price is: AUD$2,880.
Size:
217w
x 94h
x 5d
cms
Lynne Godina-Orme
 The Wild Country
Original price was: AUD$3,100.AUD$2,790Current price is: AUD$2,790.
Size:
202w
x 94h
x 5d
cms
Lynne Godina-Orme
 Take A Chance
Original price was: AUD$2,400.AUD$2,160Current price is: AUD$2,160.
Size:
240w
x 120h
x 3d
cms
Lynne Godina-Orme
 Silent Strength
Original price was: AUD$3,100.AUD$2,790Current price is: AUD$2,790.
Size:
202w
x 94h
x 5d
cms
Lynne Godina-Orme
 It’s Up To You
Original price was: AUD$2,400.AUD$2,160Current price is: AUD$2,160.
Size:
240w
x 120h
x 3d
cms
Lynne Godina-Orme
 Full Steam Ahead
Original price was: AUD$2,400.AUD$2,160Current price is: AUD$2,160.
Size:
178w
x 122h
x 4d
cms
Lynne Godina-Orme
 Rise Above
Original price was: AUD$1,200.AUD$1,080Current price is: AUD$1,080.
Size:
120w
x 120h
x 3d
cms
Lynne Godina-Orme
 Follow Your Heart
Original price was: AUD$2,400.AUD$2,160Current price is: AUD$2,160.
Size:
178w
x 122h
x 4d
cms
Lynne Godina-Orme
 Reach For The Sky
Original price was: AUD$2,300.AUD$2,070Current price is: AUD$2,070.
Size:
185w
x 122h
x 4d
cms
Lynne Godina-Orme
 Time To Reset
Original price was: AUD$2,700.AUD$2,430Current price is: AUD$2,430.
Size:
186w
x 94h
x 3d
cms
Lynne Godina-Orme
 Break The Rules
Original price was: AUD$2,700.AUD$2,430Current price is: AUD$2,430.
Size:
186w
x 94h
x 3d
cms
Lynne Godina-Orme
 Mix It Up
Original price was: AUD$290.AUD$261Current price is: AUD$261.
Size:
42w
x 52h
x 3d
cms
Lynne Godina-Orme
 Horizon Of Colour
Original price was: AUD$2,700.AUD$2,430Current price is: AUD$2,430.
Size:
186w
x 94h
x 3d
cms
Lynne Godina-Orme
 Feel The Heat
Original price was: AUD$2,700.AUD$2,430Current price is: AUD$2,430.
Size:
186w
x 94h
x 3d
cms
Lynne Godina-Orme
 Sugar And Spice
Original price was: AUD$2,300.AUD$2,070Current price is: AUD$2,070.
Size:
185w
x 122h
x 4d
cms
Lynne Godina-Orme
 Find Your Light
Original price was: AUD$2,200.AUD$1,980Current price is: AUD$1,980.
Size:
178w
x 122h
x 4d
cms
Lynne Godina-Orme
 A Crackle Of Energy
Original price was: AUD$2,200.AUD$1,980Current price is: AUD$1,980.
Size:
178w
x 122h
x 4d
cms
Lynne Godina-Orme
 A Minute Silence
Original price was: AUD$1,200.AUD$1,080Current price is: AUD$1,080.
Size:
101w
x 101h
x 4d
cms
Lynne Godina-Orme
 Never A Dull Moment
Original price was: AUD$2,200.AUD$1,980Current price is: AUD$1,980.
Size:
178w
x 122h
x 4d
cms
Lynne Godina-Orme
 A Whole New World
Original price was: AUD$1,100.AUD$990Current price is: AUD$990.
Size:
122w
x 91h
x 4d
cms
Lynne Godina-Orme
 Days Of Wonder
Original price was: AUD$980.AUD$882Current price is: AUD$882.
Size:
122w
x 91h
x 4d
cms
Lynne Godina-Orme
 Less Is More
Original price was: AUD$950.AUD$855Current price is: AUD$855.
Size:
122w
x 91h
x 4d
cms
Lynne Godina-Orme
 Sparks Fly
Original price was: AUD$980.AUD$882Current price is: AUD$882.
Size:
152w
x 60h
x 4d
cms
Lynne Godina-Orme
 Deconstructed Rainbow
Original price was: AUD$1,200.AUD$1,080Current price is: AUD$1,080.
Size:
122w
x 122h
x 4d
cms
Lynne Godina-Orme
 Fun In The Sun
Original price was: AUD$2,200.AUD$1,980Current price is: AUD$1,980.
Size:
178w
x 122h
x 4d
cms
Lynne Godina-Orme
 Building Castles
Original price was: AUD$1,200.AUD$1,080Current price is: AUD$1,080.
Size:
122w
x 122h
x 4d
cms
Lynne Godina-Orme
 See The Beauty
Original price was: AUD$850.AUD$765Current price is: AUD$765.
Size:
122w
x 122h
x 4d
cms
Lynne Godina-Orme
 Mellow Yellow
Original price was: AUD$550.AUD$495Current price is: AUD$495.
Size:
76w
x 50h
x 4d
cms
Lynne Godina-Orme
 Live Life
Original price was: AUD$2,200.AUD$1,980Current price is: AUD$1,980.
Size:
178w
x 122h
x 4d
cms
Lynne Godina-Orme
 So Much More
Original price was: AUD$1,200.AUD$1,080Current price is: AUD$1,080.
Size:
122w
x 122h
x 4d
cms
Lynne Godina-Orme
 Dream Catcher
Original price was: AUD$1,400.AUD$1,260Current price is: AUD$1,260.
Size:
90w
x 90h
x 7d
cms
Lynne Godina-Orme
 Just Add Water
Original price was: AUD$850.AUD$765Current price is: AUD$765.
Size:
153w
x 61h
x 4d
cms
Lynne Godina-Orme
 Internal Strength
Original price was: AUD$290.AUD$261Current price is: AUD$261.
Size:
46w
x 46h
x 3d
cms
Lynne Godina-Orme
Original price was: AUD$290.AUD$261Current price is: AUD$261.
Size:
42w
x 52h
x 3d
cms
Lynne Godina-Orme
 Respect For The Brave
Original price was: AUD$290.AUD$261Current price is: AUD$261.
Size:
42w
x 52h
x 3d
cms
Lynne Godina-Orme
 Happy Days
Original price was: AUD$290.AUD$261Current price is: AUD$261.
Size:
46w
x 46h
x 3d
cms
Lynne Godina-Orme
 In The Garden
Original price was: AUD$290.AUD$261Current price is: AUD$261.
Size:
42w
x 52h
x 3d
cms
Lynne Godina-Orme
 Finally Free
Original price was: AUD$290.AUD$261Current price is: AUD$261.
Size:
42w
x 52h
x 3d
cms
Lynne Godina-Orme
 Magic Moment
Original price was: AUD$290.AUD$261Current price is: AUD$261.
Size:
46w
x 46h
x 3d
cms
Lynne Godina-Orme
 Free To Be
Original price was: AUD$620.AUD$558Current price is: AUD$558.
Size:
153w
x 31h
x 4d
cms
Lynne Godina-Orme
 Come To Life
Original price was: AUD$1,100.AUD$990Current price is: AUD$990.
Size:
153w
x 31h
x 4d
cms
Lynne Godina-Orme
 Concrete Streets
Original price was: AUD$1,700.AUD$1,530Current price is: AUD$1,530.
Size:
125w
x 112h
x 3d
cms
Lynne Godina-Orme
 Heaven And Earth
Original price was: AUD$2,200.AUD$1,980Current price is: AUD$1,980.
Size:
178w
x 122h
x 4d
cms
Lynne Godina-Orme
 All Is Revealed
Original price was: AUD$1,700.AUD$1,530Current price is: AUD$1,530.
Size:
154w
x 78h
x 3.5d
cms
Lynne Godina-Orme
 As The World Turns
Original price was: AUD$1,200.AUD$1,080Current price is: AUD$1,080.
Size:
120w
x 120h
x 3d
cms
Lynne Godina-Orme
 Discover Something New
Original price was: AUD$1,200.AUD$1,080Current price is: AUD$1,080.
Size:
120w
x 120h
x 3d
cms
Lynne Godina-Orme
 Make A Statement
Original price was: AUD$1,700.AUD$1,530Current price is: AUD$1,530.
Size:
154w
x 78h
x 3.5d
cms
Lynne Godina-Orme
 Leap Of Faith
Original price was: AUD$1,700.AUD$1,530Current price is: AUD$1,530.
Size:
154w
x 78h
x 3.5d
cms
Lynne Godina-Orme
 Break Of Dawn
Original price was: AUD$1,700.AUD$1,530Current price is: AUD$1,530.
Size:
154w
x 78h
x 3.5d
cms
Lynne Godina-Orme
 Stronger Together
Original price was: AUD$1,700.AUD$1,530Current price is: AUD$1,530.
Size:
154w
x 78h
x 3.5d
cms
Lynne Godina-Orme
 Perfect Formation
Original price was: AUD$1,700.AUD$1,530Current price is: AUD$1,530.
Size:
154w
x 78h
x 3.5d
cms
Lynne Godina-Orme
 My Blue Heaven
Original price was: AUD$1,700.AUD$1,530Current price is: AUD$1,530.
Size:
154w
x 78h
x 3.5d
cms
Lynne Godina-Orme
 Dream With Your Eyes Open
Original price was: AUD$1,100.AUD$990Current price is: AUD$990.
Size:
122w
x 122h
x 4d
cms
Lynne Godina-Orme
 Shine Bright
Original price was: AUD$1,100.AUD$990Current price is: AUD$990.
Size:
122w
x 122h
x 4d
cms
Lynne Godina-Orme
 Water Baby
Original price was: AUD$2,200.AUD$1,980Current price is: AUD$1,980.
Size:
178w
x 122h
x 4d
cms
Lynne Godina-Orme
 Time To Breath
Original price was: AUD$2,200.AUD$1,980Current price is: AUD$1,980.
Size:
178w
x 122h
x 4d
cms
Lynne Godina-Orme
 Time To Fly
Original price was: AUD$1,200.AUD$1,080Current price is: AUD$1,080.
Size:
120w
x 120h
x 3d
cms
Lynne Godina-Orme
 Hope And Strength
Original price was: AUD$2,400.AUD$2,160Current price is: AUD$2,160.
Size:
240w
x 120h
x 3d
cms
Lynne Godina-Orme
 One Day At A Time
Original price was: AUD$900.AUD$810Current price is: AUD$810.
Size:
120w
x 80h
x 3d
cms
Lynne Godina-Orme
 Find Your Path
Original price was: AUD$1,200.AUD$1,080Current price is: AUD$1,080.
Size:
120w
x 120h
x 3d
cms
Lynne Godina-Orme
 New Horizons
Original price was: AUD$1,200.AUD$1,080Current price is: AUD$1,080.
Size:
120w
x 120h
x 3d
cms
Lynne Godina-Orme
 Follow The Sun
Original price was: AUD$1,200.AUD$1,080Current price is: AUD$1,080.
Size:
120w
x 120h
x 3d
cms
Lynne Godina-Orme
 Take Your Time
Original price was: AUD$2,400.AUD$2,160Current price is: AUD$2,160.
Size:
240w
x 120h
x 3d
cms
Lynne Godina-Orme
 Waterfall
Original price was: AUD$2,400.AUD$2,160Current price is: AUD$2,160.
Size:
240w
x 120h
x 3d
cms
Lynne Godina-Orme
 Celebrate Every Day
Original price was: AUD$2,400.AUD$2,160Current price is: AUD$2,160.
Size:
178w
x 122h
x 4d
cms
Lynne Godina-Orme
 Beauty In Blue
Original price was: AUD$2,400.AUD$2,160Current price is: AUD$2,160.
Size:
240w
x 120h
x 3d
cms
Lynne Godina-Orme
 Edge Of The Ocean
Original price was: AUD$2,400.AUD$2,160Current price is: AUD$2,160.
Size:
240w
x 120h
x 3d
cms
Lynne Godina-Orme
 Feed Your Imagination
Original price was: AUD$2,400.AUD$2,160Current price is: AUD$2,160.
Size:
178w
x 123h
x 4d
cms
Lynne Godina-Orme
 Break Away
Original price was: AUD$2,400.AUD$2,160Current price is: AUD$2,160.
Size:
178w
x 122h
x 4d
cms
Lynne Godina-Orme
 Land Of Colours
Original price was: AUD$700.AUD$630Current price is: AUD$630.
Size:
60w
x 90h
x 4d
cms
Lynne Godina-Orme
 Spread Your Wings
Original price was: AUD$2,400.AUD$2,160Current price is: AUD$2,160.
Size:
122w
x 178h
x 4d
cms
Lynne Godina-Orme
 Into The Blue
Original price was: AUD$2,400.AUD$2,160Current price is: AUD$2,160.
Size:
178w
x 122h
x 4d
cms
Lynne Godina-Orme
 Heart Of Gold
Original price was: AUD$1,400.AUD$1,260Current price is: AUD$1,260.
Size:
122w
x 122h
x 4d
cms
Lynne Godina-Orme
 Finding Strength
Original price was: AUD$1,200.AUD$1,080Current price is: AUD$1,080.
Size:
122w
x 122h
x 4d
cms
Lynne Godina-Orme
 Still Waters Run Deep
Original price was: AUD$1,400.AUD$1,260Current price is: AUD$1,260.
Size:
122w
x 122h
x 4d
cms
Lynne Godina-Orme
 Genie In A Bottle
Original price was: AUD$2,400.AUD$2,160Current price is: AUD$2,160.
Size:
178w
x 123h
x 4d
cms
Lynne Godina-Orme
 Symphony Of Colours
Original price was: AUD$2,400.AUD$2,160Current price is: AUD$2,160.
Size:
178w
x 122h
x 4d
cms
Lynne Godina-Orme
 Take A Break
Original price was: AUD$1,200.AUD$1,080Current price is: AUD$1,080.
Size:
120w
x 120h
x 3d
cms
Lynne Godina-Orme
 Organised Chaos – Diptych
Original price was: AUD$2,400.AUD$2,160Current price is: AUD$2,160.
Size:
240w
x 120h
x 3d
cms
Lynne Godina-Orme
 Bring Me Peace – Triptych
Original price was: AUD$2,400.AUD$2,160Current price is: AUD$2,160.
Size:
240w
x 120h
x 3d
cms
Lynne Godina-Orme
 Perfect Storm
Original price was: AUD$1,100.AUD$990Current price is: AUD$990.
Size:
101w
x 101h
x 4d
cms
Lynne Godina-Orme
 Taking A Chance
Original price was: AUD$1,400.AUD$1,260Current price is: AUD$1,260.
Size:
153w
x 61h
x 4d
cms
Lynne Godina-Orme
 Crashing To Shore
Original price was: AUD$1,100.AUD$990Current price is: AUD$990.
Size:
101w
x 101h
x 4d
cms
Lynne Godina-Orme
 Under The Sun
Original price was: AUD$1,400.AUD$1,260Current price is: AUD$1,260.
Size:
152w
x 76h
x 4d
cms
Lynne Godina-Orme
 Change
Original price was: AUD$1,200.AUD$1,080Current price is: AUD$1,080.
Size:
122w
x 122h
x 4d
cms
Lynne Godina-Orme
 Blossom Garden
Original price was: AUD$1,200.AUD$1,080Current price is: AUD$1,080.
Size:
120w
x 120h
x 3d
cms
Lynne Godina-Orme
 Lucky Numbers
Original price was: AUD$900.AUD$810Current price is: AUD$810.
Size:
120w
x 80h
x 3d
cms
Lynne Godina-Orme
 Standing Strong
Original price was: AUD$900.AUD$810Current price is: AUD$810.
Size:
122w
x 76h
x 4d
cms
Lynne Godina-Orme
 Down To Earth
Original price was: AUD$1,200.AUD$1,080Current price is: AUD$1,080.
Size:
122w
x 122h
x 4d
cms
Lynne Godina-Orme
 Concrete Jungle
Original price was: AUD$2,100.AUD$1,890Current price is: AUD$1,890.
Size:
153w
x 122h
x 4d
cms
Lynne Godina-Orme
 Change Of Seasons
Original price was: AUD$980.AUD$882Current price is: AUD$882.
Size:
91w
x 91h
x 4d
cms
Lynne Godina-Orme
 Energy Overload
Original price was: AUD$900.AUD$810Current price is: AUD$810.
Size:
121w
x 91h
x 4d
cms
Lynne Godina-Orme
 Summer Holiday
Original price was: AUD$490.AUD$441Current price is: AUD$441.
Size:
90w
x 30h
x 3d
cms
Lynne Godina-Orme
 Splish Splash
Original price was: AUD$490.AUD$441Current price is: AUD$441.
Size:
80w
x 40h
x 3d
cms
Lynne Godina-Orme
 Another Time
Original price was: AUD$900.AUD$810Current price is: AUD$810.
Size:
120w
x 80h
x 3d
cms
Lynne Godina-Orme
 Digging Deep
Original price was: AUD$1,400.AUD$1,260Current price is: AUD$1,260.
Size:
122w
x 91h
x 4d
cms
Lynne Godina-Orme
 Eye Of The Tiger
Original price was: AUD$1,200.AUD$1,080Current price is: AUD$1,080.
Size:
100w
x 100h
x 4d
cms
Lynne Godina-Orme
 What Lies Beneath
Original price was: AUD$2,300.AUD$2,070Current price is: AUD$2,070.
Size:
183w
x 122h
x 4d
cms
Lynne Godina-Orme
 Romance
Original price was: AUD$450.AUD$405Current price is: AUD$405.
Size:
100w
x 75h
x 4d
cms
Lynne Godina-Orme
 After The Rain
Original price was: AUD$900.AUD$810Current price is: AUD$810.
Size:
122w
x 91h
x 4d
cms
Lynne Godina-Orme
 Mask Of Gold
Original price was: AUD$1,200.AUD$1,080Current price is: AUD$1,080.
Size:
100w
x 100h
x 4d
cms
Lynne Godina-Orme
 True Colours
Original price was: AUD$1,100.AUD$990Current price is: AUD$990.
Size:
102w
x 102h
x 4d
cms
Lynne Godina-Orme
 Colour Fusion
Original price was: AUD$2,700.AUD$2,430Current price is: AUD$2,430.
Size:
180w
x 120h
x 4d
cms
Lynne Godina-Orme
 Tangled Web
Original price was: AUD$2,300.AUD$2,070Current price is: AUD$2,070.
Size:
183w
x 122h
x 4d
cms
Lynne Godina-Orme
 New Ground
Original price was: AUD$600.AUD$540Current price is: AUD$540.
Size:
153w
x 38h
x 4d
cms
Lynne Godina-Orme
 Prelude
Original price was: AUD$1,500.AUD$1,350Current price is: AUD$1,350.
Size:
125w
x 95h
x 2d
cms
Lynne Godina-Orme
 Abstract Inkblot
Original price was: AUD$1,200.AUD$1,080Current price is: AUD$1,080.
Size:
150w
x 100h
x 2d
cms
Lynne Godina-Orme
 Fire And Ice
Original price was: AUD$600.AUD$540Current price is: AUD$540.
Size:
115w
x 95h
x 2d
cms
Lynne Godina-Orme
 Red Light Blue Light
Original price was: AUD$750.AUD$675Current price is: AUD$675.
Size:
76w
x 110h
x 3d
cms
Paul Crowe
 Still Life with Teapot, Teacup and Lemons
Original price was: AUD$250.AUD$225Current price is: AUD$225.
Size:
40w
x 30h
x 1.5d
cms
Della Gogoll
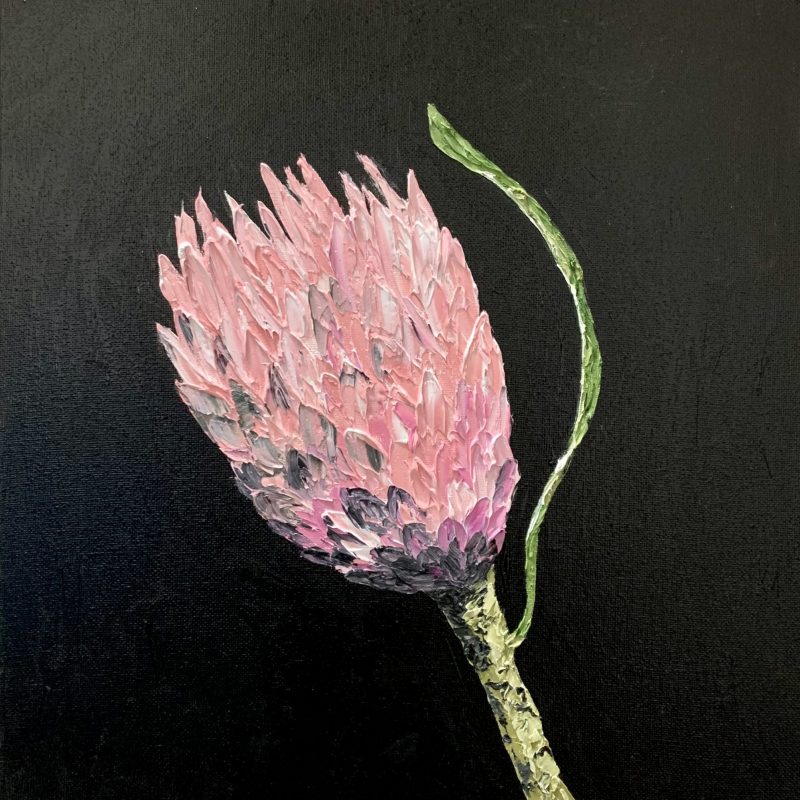 Pink Protea
Original price was: AUD$350.AUD$315Current price is: AUD$315.
Size:
34w
x 34h
x 5d
cms
Anjana Rai
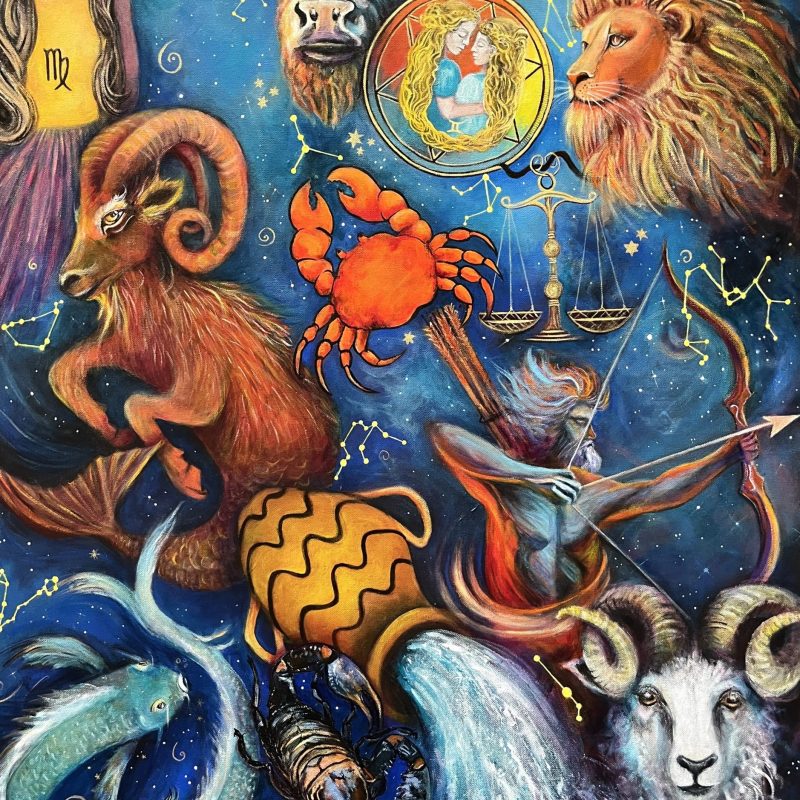 Oh My Stars
Original price was: AUD$2,990.AUD$2,691Current price is: AUD$2,691.
Size:
76w
x 101.5h
x 3.5d
cms
Cathy Gilday
 Looking at Rodin in Paris
Original price was: AUD$950.AUD$855Current price is: AUD$855.
Size:
35w
x 45.5h
x 3.8d
cms
Eileen Rigby